TITLE:
How to configure APS (Advanced Password Services) Forgot Password (FPS) Interface
DESCRIPTION:
Following steps will guide you through configuring APS Forgot Password Interface starting with SiteMinder release r12.5 and higher.
PREREQUISITES:
- APS is enabled on the Policy Server.
- APS schema is created for all the user entries.
- APSExpire is run to initialize base APS base data for all the users
- SmPortal.cfg is already configured (If not, steps are provided below on how to do this )
INSTRUCTIONS:
1. User Directory Configuration
Store question number and the answer to be used during Forgot Password verify stage in any user attribute
exactly as shown below:

In the screen above, the user attribute 'businessCategory' is being used for storing the Question ID and the
corresponding answer for that question.
2. Policy Server Configuration (Changes to APS.cfg)
a. (Optional) configure FPS Audit logging under [FPS] section
Audit Log=C:/Program Files (x86)/CA/siteminder/log/FPS.log
b. Configure the directory where FPS searches the users under [FPS] section
Directory=cadir-01:3000
c. Modify Look Up attributes to match attribute name in your user directory under [FPS-Identify] section.
(Note , the name of the display attributes are matched from Identify.asp/Identify.jsp page)
Lookup=UserID=uid;Mail=mail;FirstName=~givenname;LastName=~sn;Phone=telephoneNumber,homePhone ;City=~l;State=st
d. Specify the user attribute to look up for the answer
Lookup=SecretAnswer=businessCategory
e. Specify the user attribute to look up for the question/answer that is to be used for FPS verify state.
This configuration is available in [FPS-Verify] section.
Initial=*SecretQuestion=businessCategory[format=A,Pick=2,sorted]
f. Specify the user attribute that needs to be displayed after the password change is successful in [FPS-Confirm] section
Initial=uid
(Note :
*) Only the most essential fields have been configured here for illustration purpose, for the detailed list of
attributes available for FPS refer to APS documentation.
*) If Active Directory is user store, then you will also need to configure attribute mapping under [Mappings] section.
e.g.
inetOrgPerson=user
userPassword=unicodePwd
smapsPassword =
groupOfUniqueNames=group
uniqueMember=member
)
3. Web Server Configuration (For illustration purpose, we will use IIS 7.5 web server)
Define a virtual CGI directory for the directory that contains the FPS CGI Program
- Open IIS Manager ( type "inetmgr.exe" in the Run window and click enter)
- Right Click on the Default Web Site and select Add Virtual Directory option. The virtual directory wizard opens.
Specify as following :
Alias : FPS
Physical path : <Web_Agent_Installation_Directory>\win32\bin\Web\FPS

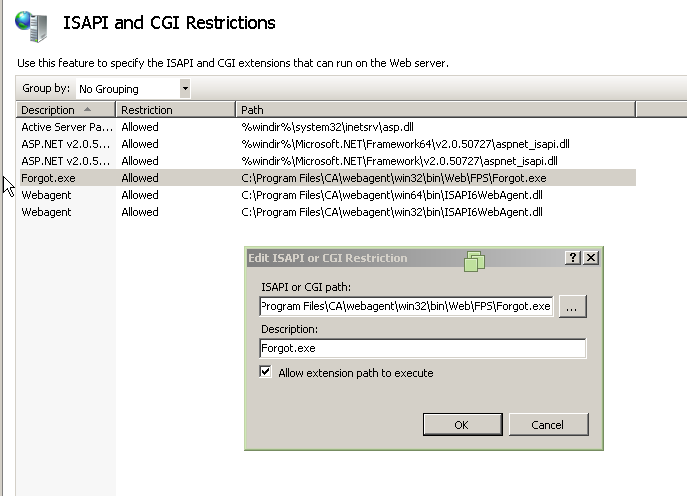
Add ISAPI and CGI Restrictions for FPS CGI
- Open IIS Manager and navigate to the server level.
- Double Click on ISAPI and CGI Restrictions
- From the Action menu click "Add" to add new restrictions
Specify as following :
ISAPI or CGI path: <Web_Agent_Installation_Directory>\win32\bin\Web\FPS\Forgot.exe
Description : Forgot.exe
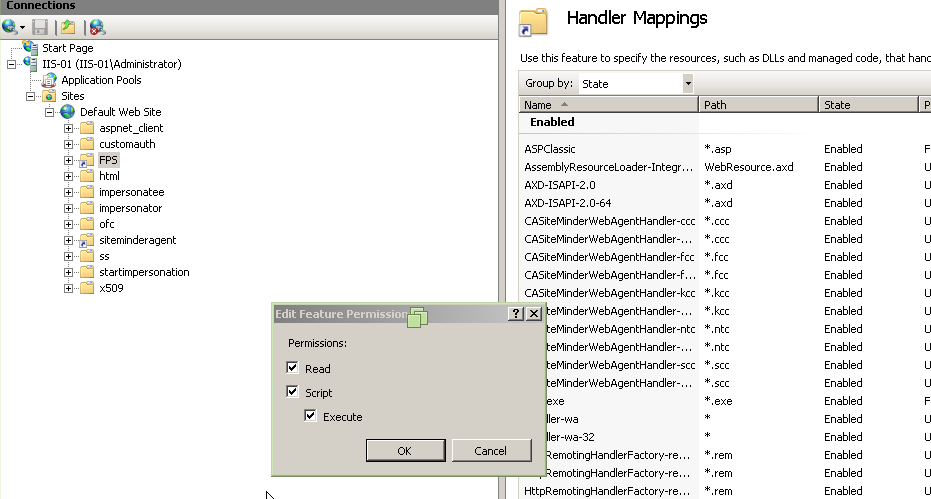
Edit Feature Permissions for the Handler Mappings Feature for FPS Virtual Directory
Select Read
Select Scripts
Select Execute
Modify the default SmPortal.cfg file installed.
- Edit the SmPortal.cfg file located at <Web_Agent_Installation_Directory>\win32\bin folder.
Specify as following :
MyServer.ip = <Your Policy Server IP address>
By default, FPS is configured with a 4x agent by name "FPS" with shared secret "secret"
Change password is configured with a 4x agent by name "SMCPW"" with shared secret "secret"
By logging into the Administrative UI create the matching 4x agent as below:


- The final SmPortal.cfg should look like following :


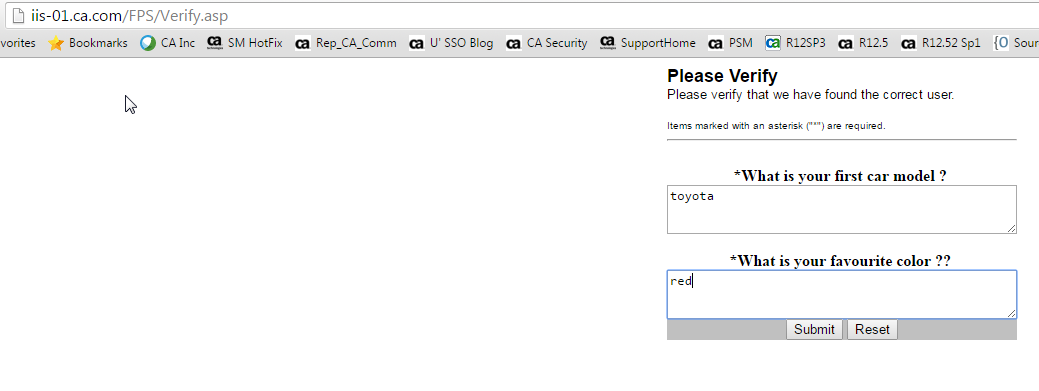
- Modify the Verify.asp (Verify.jsp) to store the actual questions corresponding the Question ID configured in user directory :

- (Optional) Enable tracing for FPS and Change password services
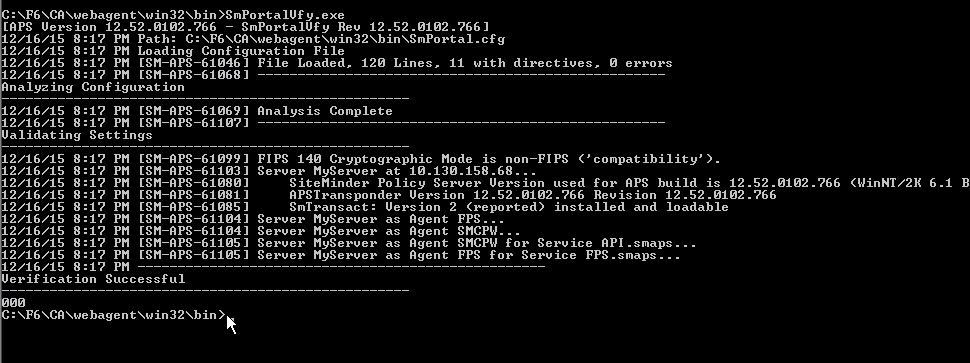
- Validate SmPortal.cfg configuration using the SmPortalVfy.exe tool located at<Web_Agent_Installation_Directory>\win32\bin folder. It should state the verification as successful as below :
TESTING & VERIFICATION:
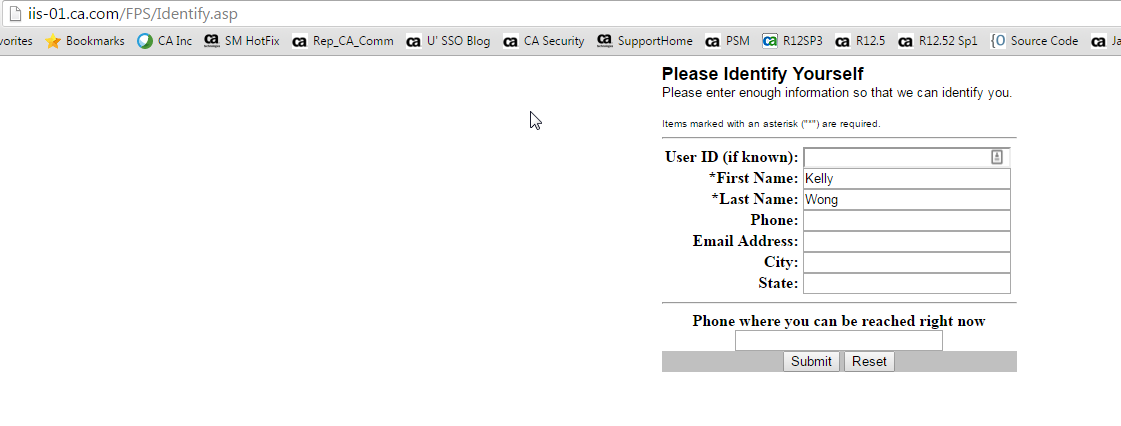
1. Access FPS interface
e.g. http://<server.domain.com>/FPS/forgot.exe
2. Provide Required Fields and optional fields as necessary and click Submit.
3. Once the user look up is successful using the provided user information, the user will be prompted to verify with Question and Answer
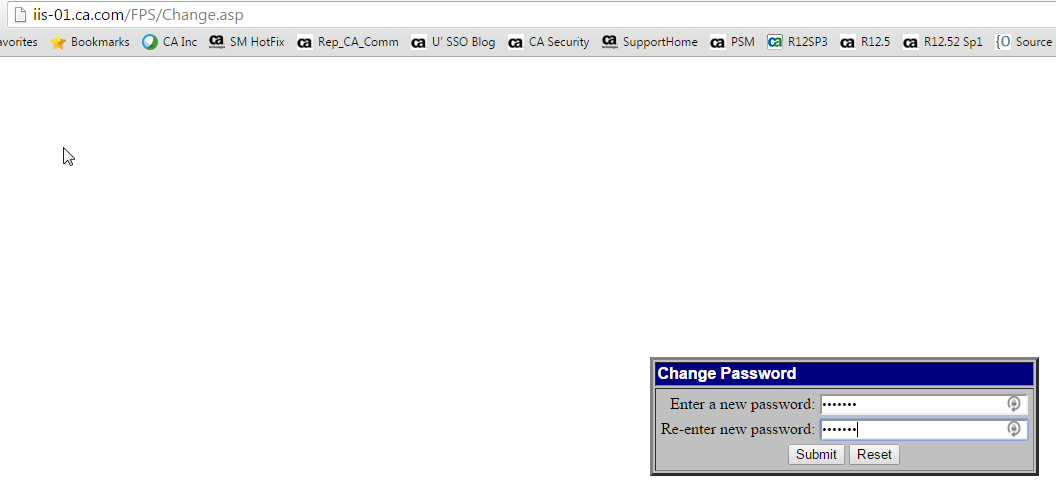
4. Upon confirmation of the question/answer, the user will finally be prompted to change his/her password
5. In the confirmation screen, the information related to the user is displayed as below:

Sample policy server trace log with the FPS tracing turned on :
Sample FPS Audit log (FPS.log) :
Additional Information: