Changes on the Policy Server
1. Create X.509 certificate authentication scheme as below :

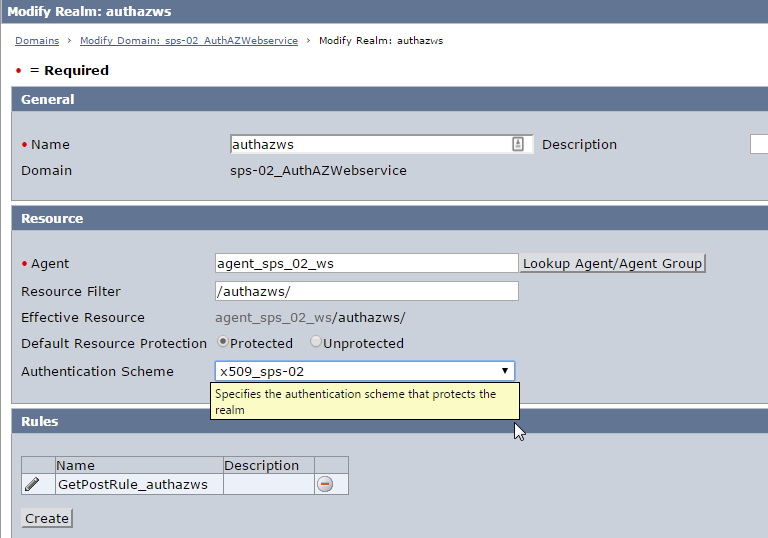
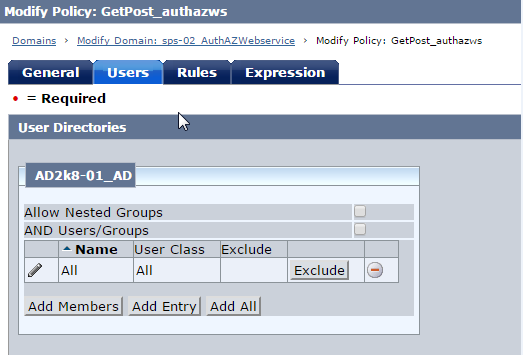
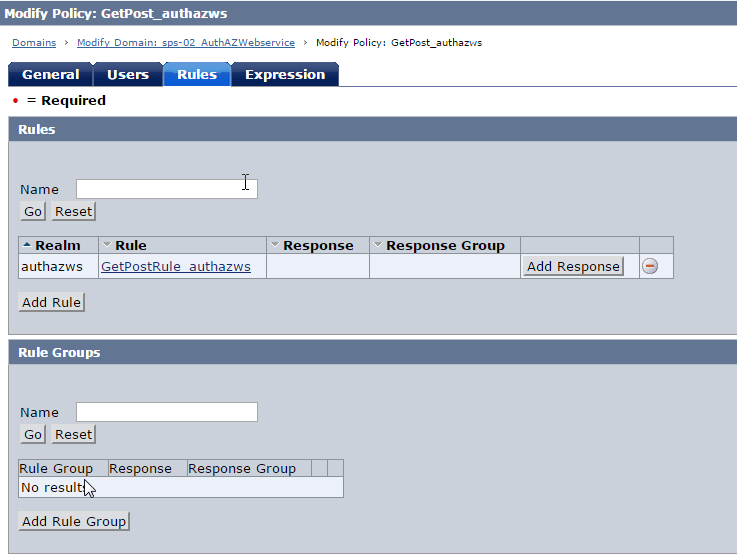
2. Create Domain, Realm, Rule (get/post), Policy . Protect the realm with the X.509 authentication scheme.

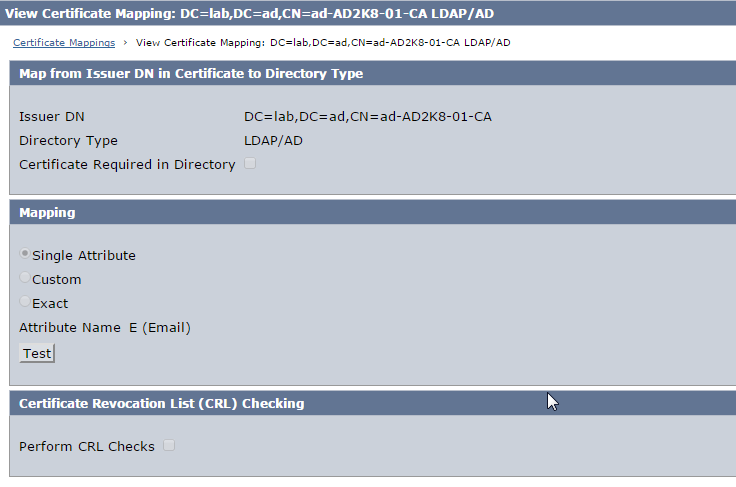
3. Click Certificate Mappings under Directory and create mapping as below.
Note :
- Ensure that the Issuer DN matches exactly as in the user certificate.
- Choose the mapping attribute as per the Active Directory LDAP User DN lookup configuration
Changes on the CA Access Gateway
A) Configure SSL for Apache
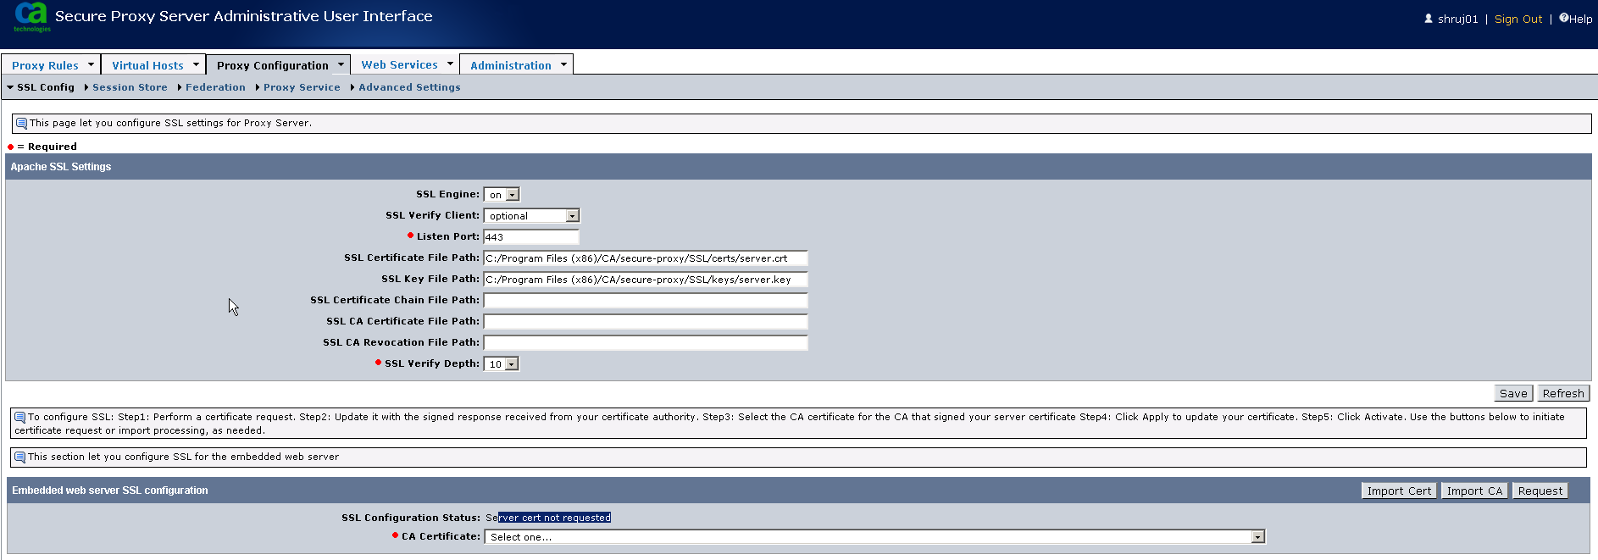
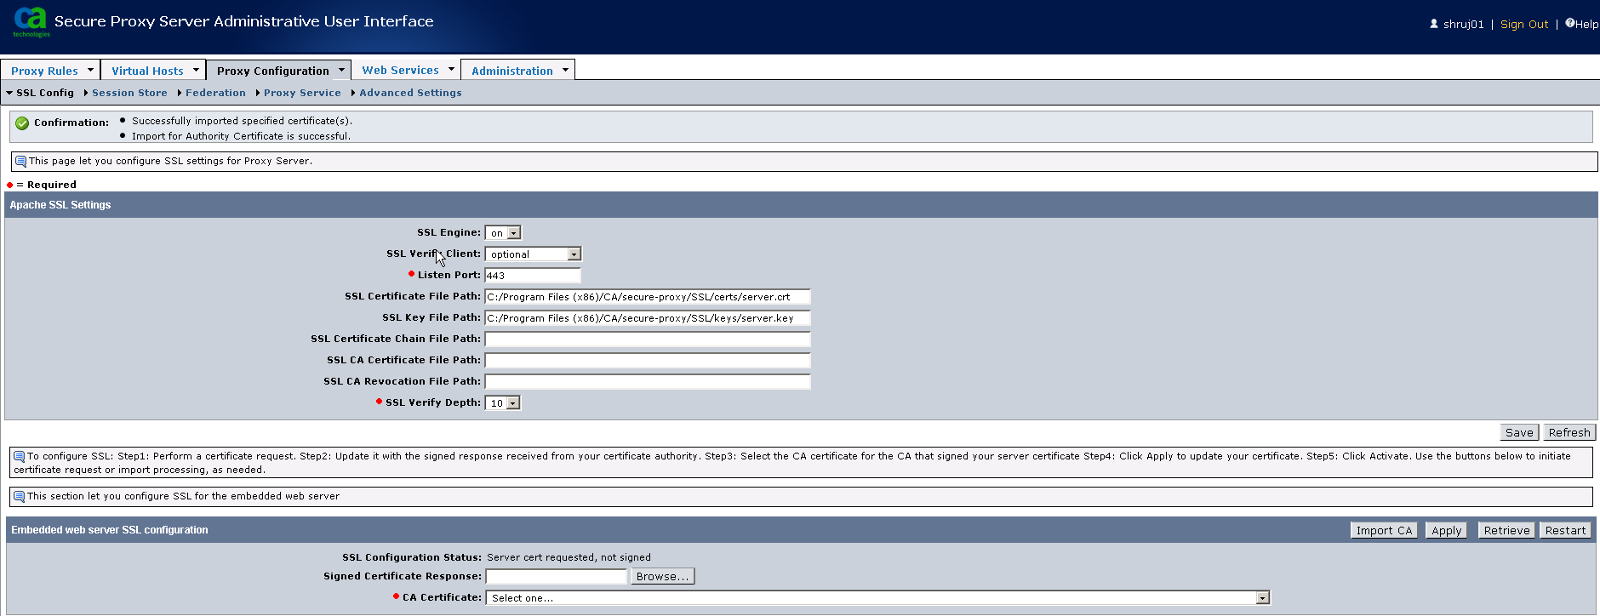
1. Login to Proxy UI and navigate to Proxy Configuration > SSL Config
Click Request button under Embedded Web Server SSL Configuration
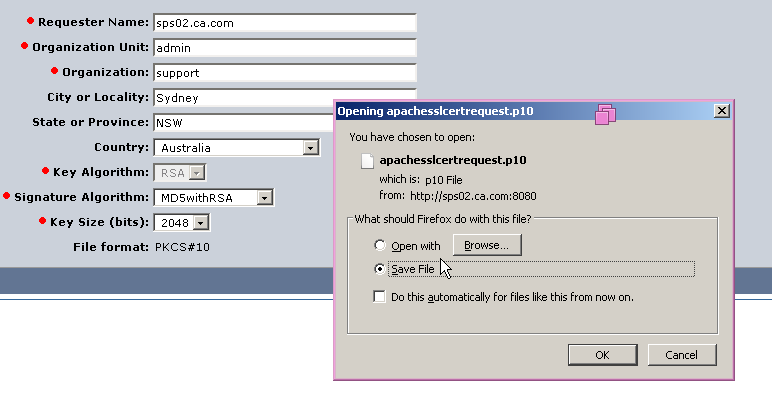
2. Enter the requested details. Ensure that the Requester Name matches the host name as configured in the VirtualHost configuration in Server.conf
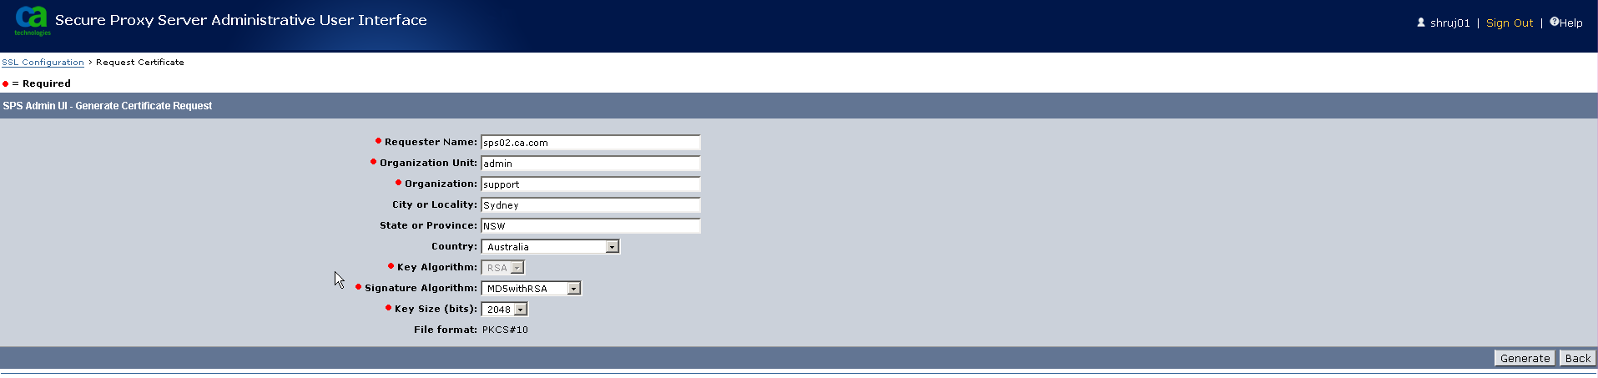
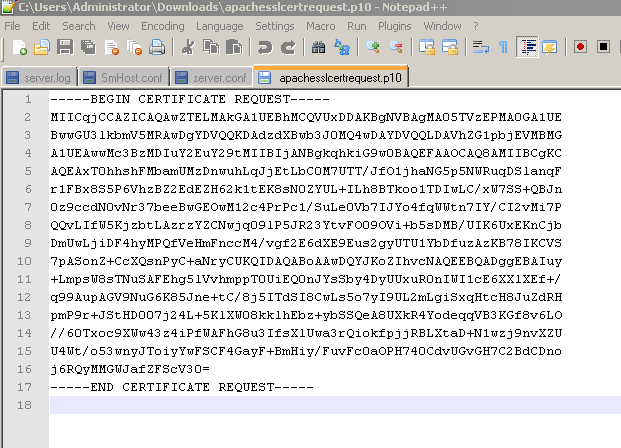
3. Click Generate button to create the CSR (certificate signing request file).
Save the CSR file. You will need to submit this file to CA for signing it.
4. Now, before importing the signed server certificate file from CA , if the CA is not a Trusted CA , you will need to import the CA along with it's intermediate certificate.
Navigate to Proxy Configuration > SSL Config
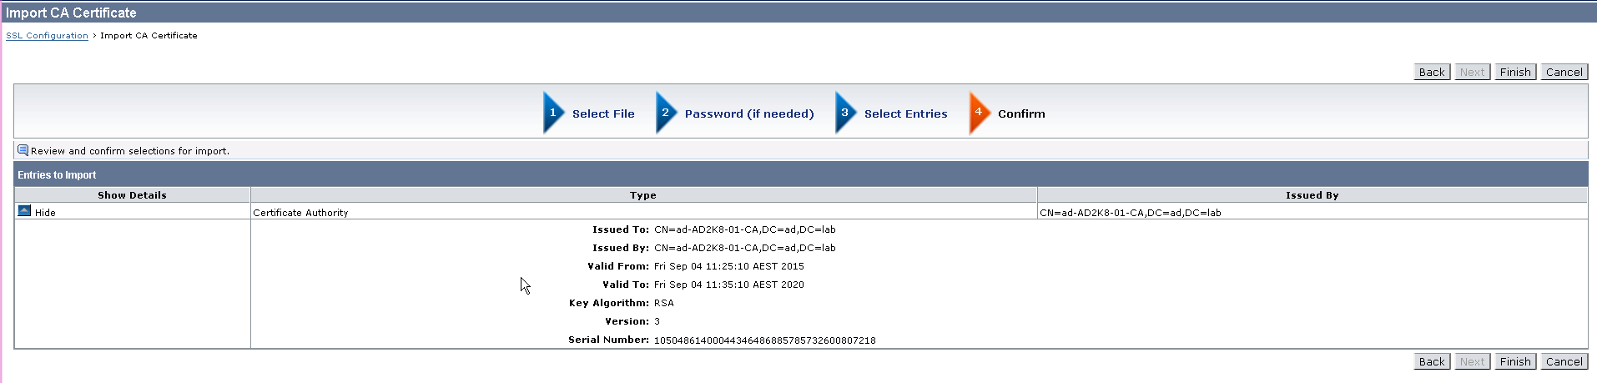
Click Import CA under Embedded Web Server SSL Configuration

5. Click on Browse button and select the CA certificate. Then, continue clicking Next until the CA certificate is imported successfully.
If there are Intermediate CA certificate, repeat the same steps to import them as well.


6. Once CA is imported, you are now ready to import the signed server certificate from CA.
Navigate to Proxy Configuration > SSL Config.
Under Embedded Web Server SSL Configuration , Click Browse to select the signed server certificate, Choose the CA which signed it from the CA Certificate drop down and Click Apply.
Click Import CA under Embedded Web Server SSL Configuration

7. Upon import , confirmation message is shown. You will need to restart the CA Secure Proxy service to fully enable the SSL configuration.
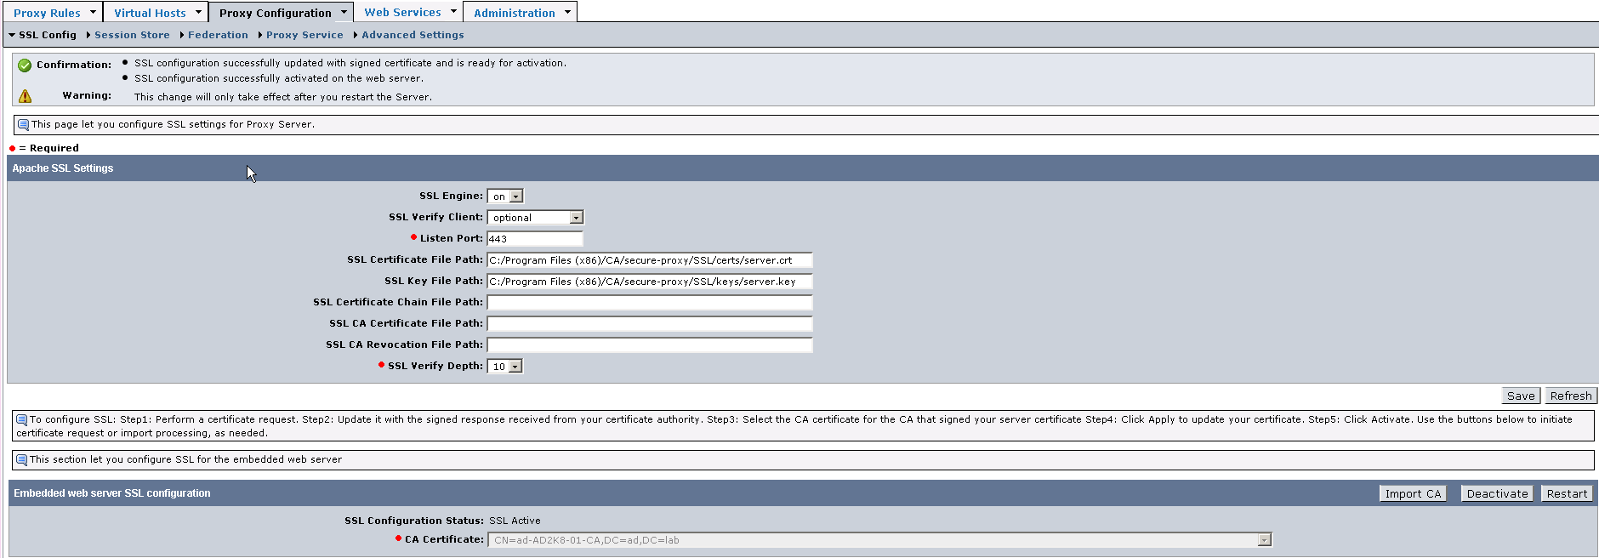
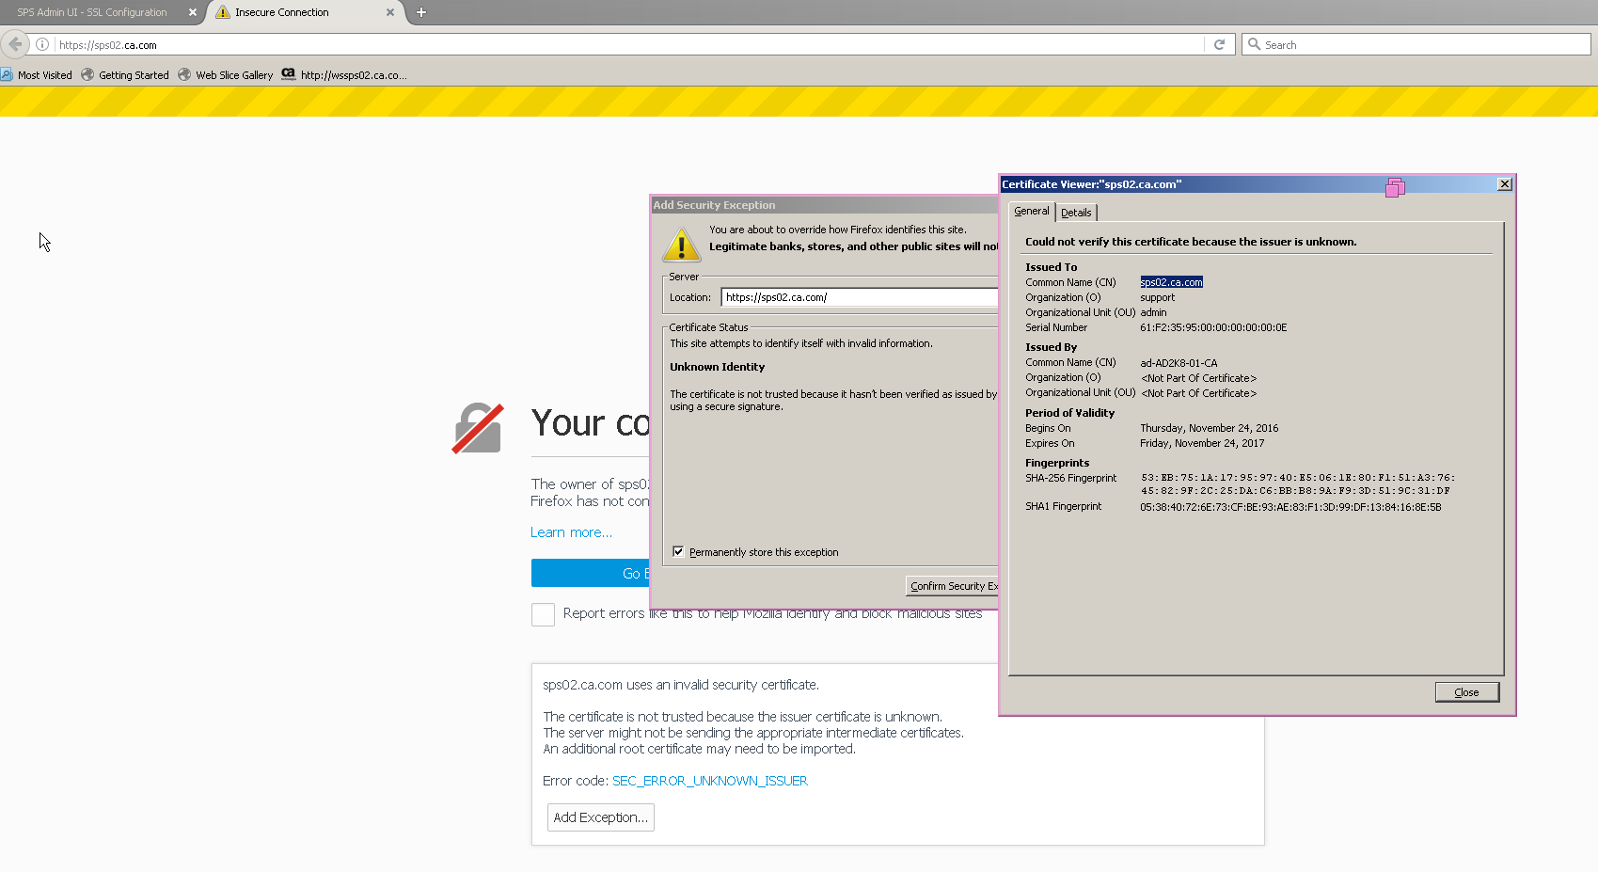
8. Restart CA Secure Proxy Service and try accessing the Apache on https to confirm that SSL is enabled :
B) Configure SPS Apache for X.509 client certificate authentication
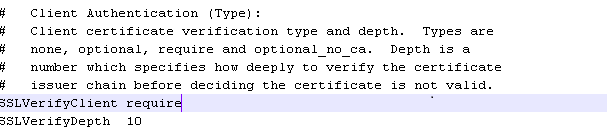
1. To ensure that Apache request certificate from client (browser) , modify the httpd-ssl.conf file under <CA Access Gateway Home>\httpd\conf\extra folder as below :
Change SSLVerifyClient from optional to require
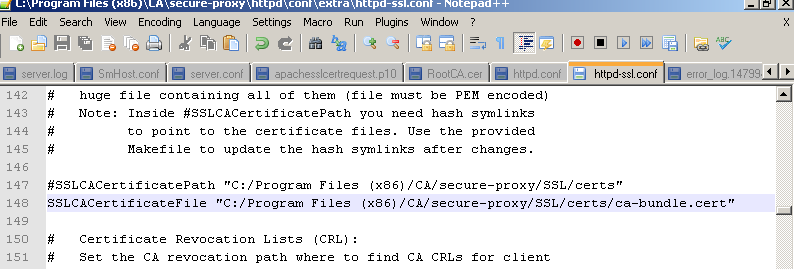
2. Next, un-comment the SSLCACertificateFile parameter. The ca-bundle.cert will already have been configured with the CA certificate which signed the Apache server certificate.
If the CA which signed your client certificate is not the same as the one which signed your Apache server certificate, manually add the CA certificate to the ca-bundle.cert file.
(For my testing, both CA are the same so I didn't have to add any extra certificate into this file)
3. Restart CA Secure Proxy Service.
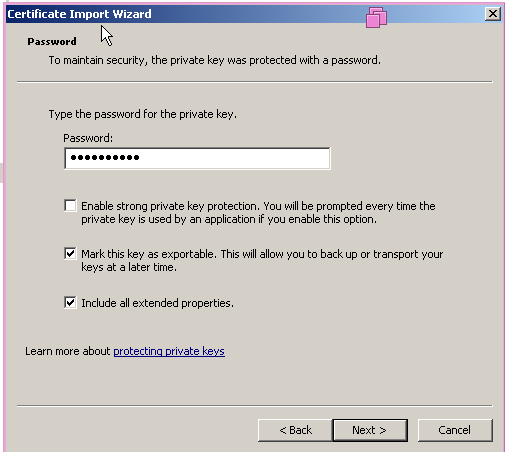
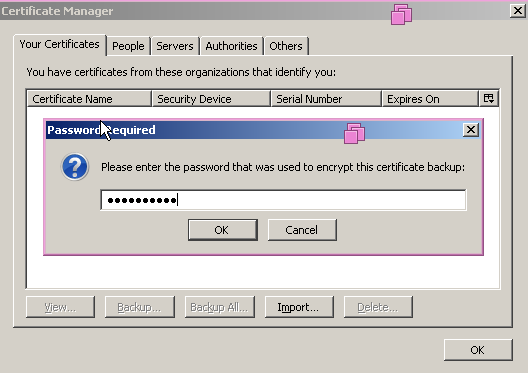
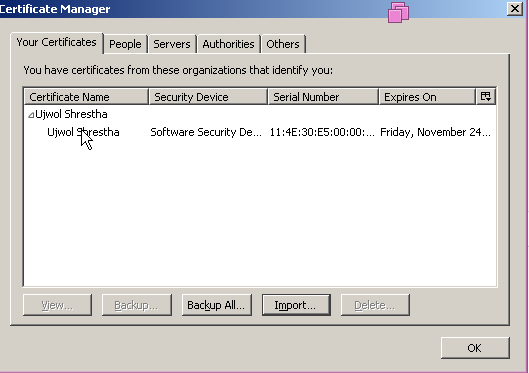
Changes on the client machine
Import the client certificate either using MMC or using Browser itself.

Testing:
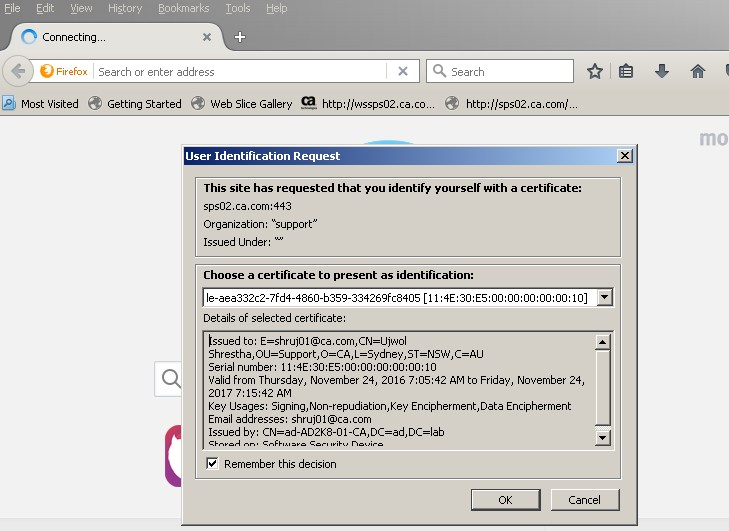
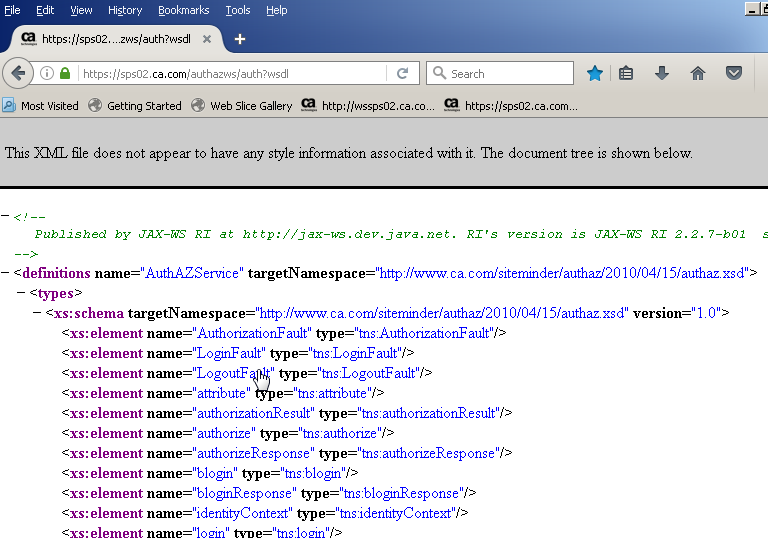
1. From the client machine access the resource protected with X.509 authentication scheme. For this test, I protected the Auth/Az webservice with X.509 certificate authentication scheme so I will try accessing the same on HTTPS port.
2. It will prompt you to select the client/user certificate. Choose the appropriate user certificate and click Ok.