Labels affords users with the ability to quickly assign community members to custom criteria, similar to mailing lists. Once created you can easily use them for sharing, messaging, document approval, and more. For instance, I created a label with only my immediate team members assigned. No need to type SamCreek, LennThompson or J.J.Lovett long names anymore!
Labels are only visible to the creator. Recipients of shares or direct messages where labels were used, see only the list of participants, not the label itself.
To create a new label:
1. Be sure to follow other people within your community. You may only apply labels to users you are following.
2. Navigate to Browse - People

3. Select Following in the left-hand navigation.
4. Under Following, click on Create Label.

5. Select a color for your label and name it.
6. Select Save - then refresh the page
7. Next to the “Following” button for each of your connections will be an "Apply Labels" button.
8. You can create multiple labels and then scroll through your connections and click on the labels button to apply them to one (or more) of your labels.
9. As you apply labels to your connections, you will see the corresponding color dots appear next to their names.
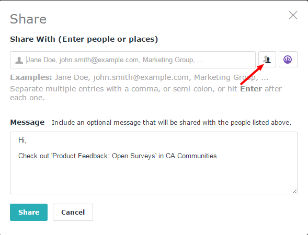
When sharing content you can select the label you wish to share and not have to type in each users name.