Document ID: TEC1230085
Last Modified Date: 2/1/2015
Author: SergioMorales
- Products
- CA Application Performance Management
- Releases
- CA Application Performance Management:Release:9.6
- CA Application Performance Management:Release:CA APM 9.6
- CA Application Performance Management:Release:CA APM 9.7
- CA Application Performance Management:Release:9.5
- CA Application Performance Management:Release:CA APM 9.5
- Components
Case Scenario:
Install a Jboss domain setup with 1 server group (clu01) with 2 jboss instances (srv01,srv02).
AGENT_HOME= /quick_startup_scripts/jboss-eap-6.1/NoInstaller9.1.7.0jboss/wily
JBOSS_HOME=/jboss-eap-6.1
Step 1: To enable autonaming:
Copy AGENT_HOME/common/WebAppSupport.jar to AGENT_HOME/core/ext
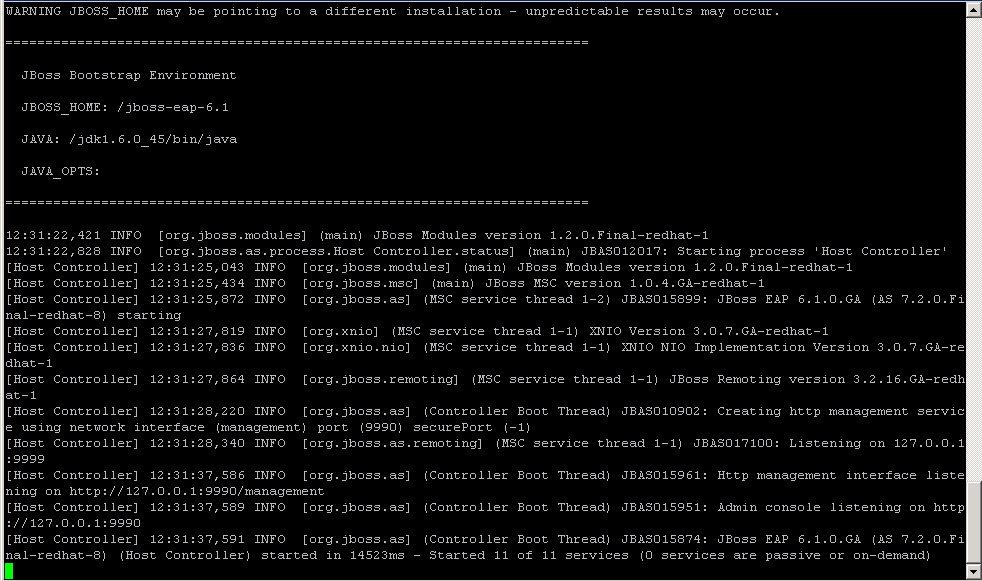
Step 2: Start Jboss in domain mode by running JBOSS_HOME/bin/domain.sh
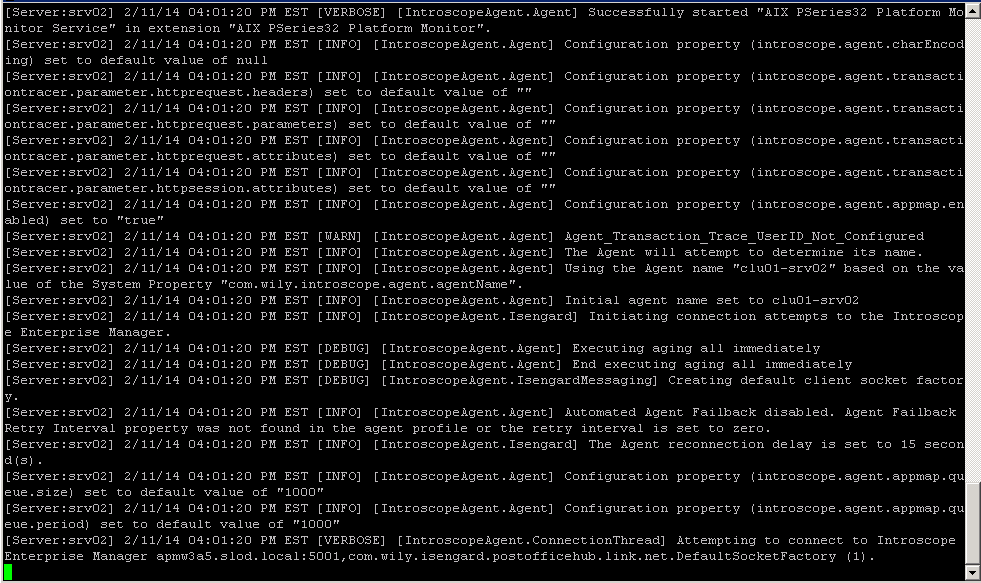
Below the ouput:

Step 3: Create a Management user using JBOSS_HOME/bin/add-user.sh.
Before that you need to edit the script and define the JAVA_HOME environment variable.
# Add User Utility
#
# A simple utility for adding new users to the properties file used
# for domain management authentication out of the box.
#
DIRNAME=`dirname "$0"`
JAVA_HOME=/jdk1.6.0_45
…..
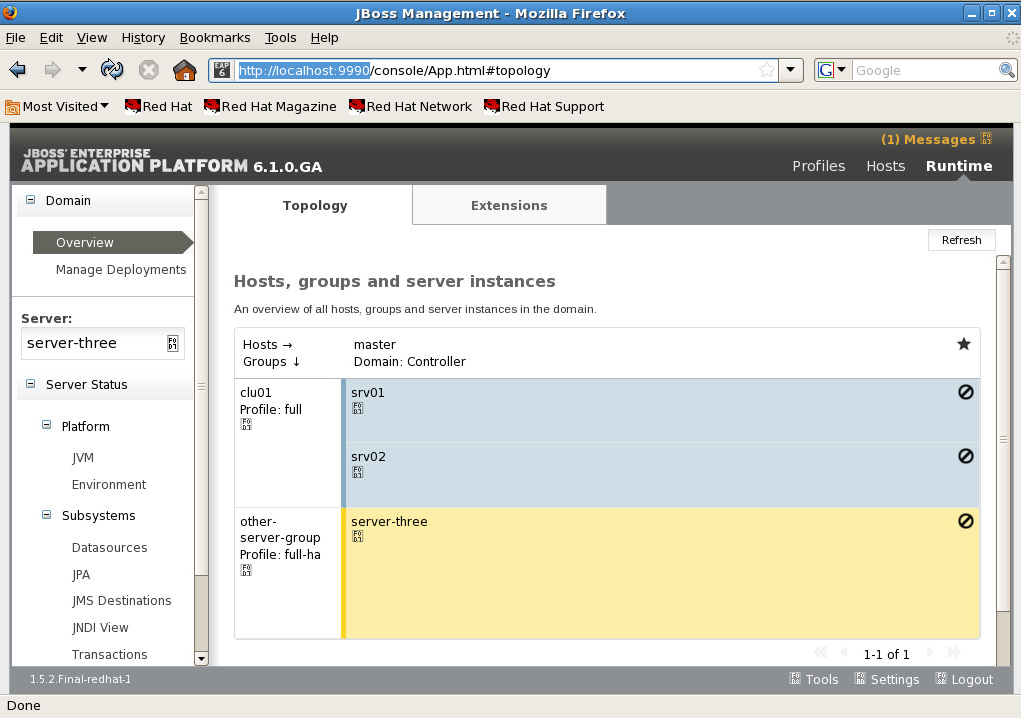
Step 4: Go to the Jboss Admin console: http://localhost:9990
When prompted for credentials enter the user you created above
Step 5: Configure the Agent.jar
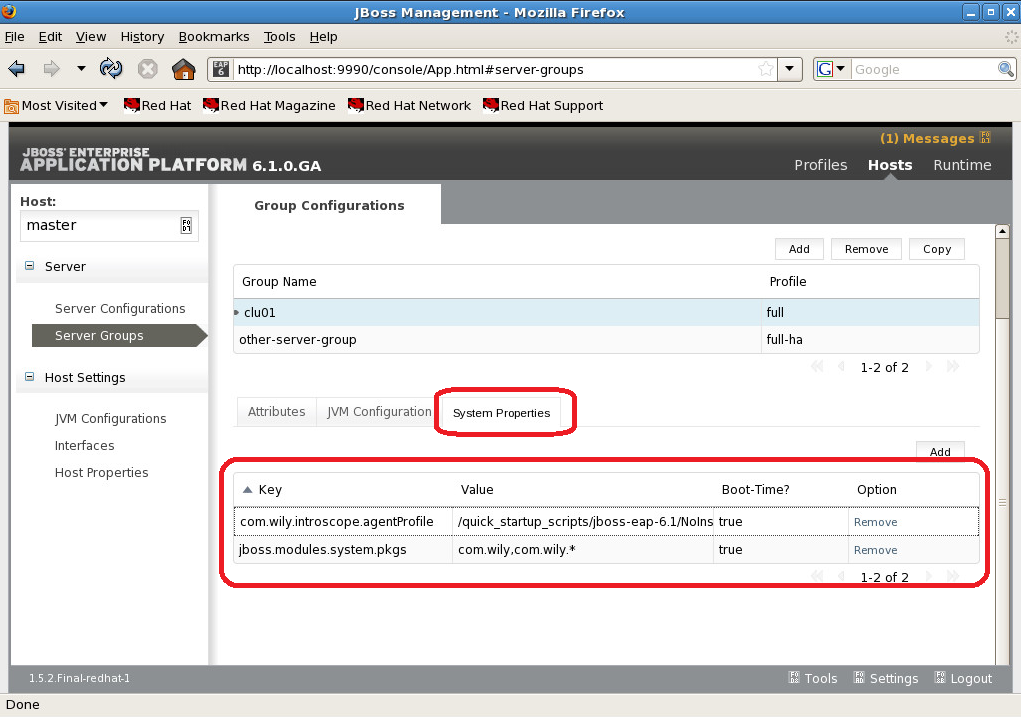
Click Host > Server Groups
Select the server group you want to instrument
Click JVM Configuration

Click Edit button, set JVM options=-javaagent:/quick_startup_scripts/jboss-eap-6.1/NoInstaller9.1.7.0jboss/wily/Agent.jar
Click Save

Step 6: Configure the Agent profile and additional system property:
Click “System Properties” tab and add the below 2 properties:
- jboss.modules.system.pkgs=com.wily,com.wily.*
- com.wily.introscope.agentProfile=/quick_startup_scripts/jboss-eap-6.1/NoInstaller9.1.7.0jboss/wily/core/config/IntroscopeAgent.profile
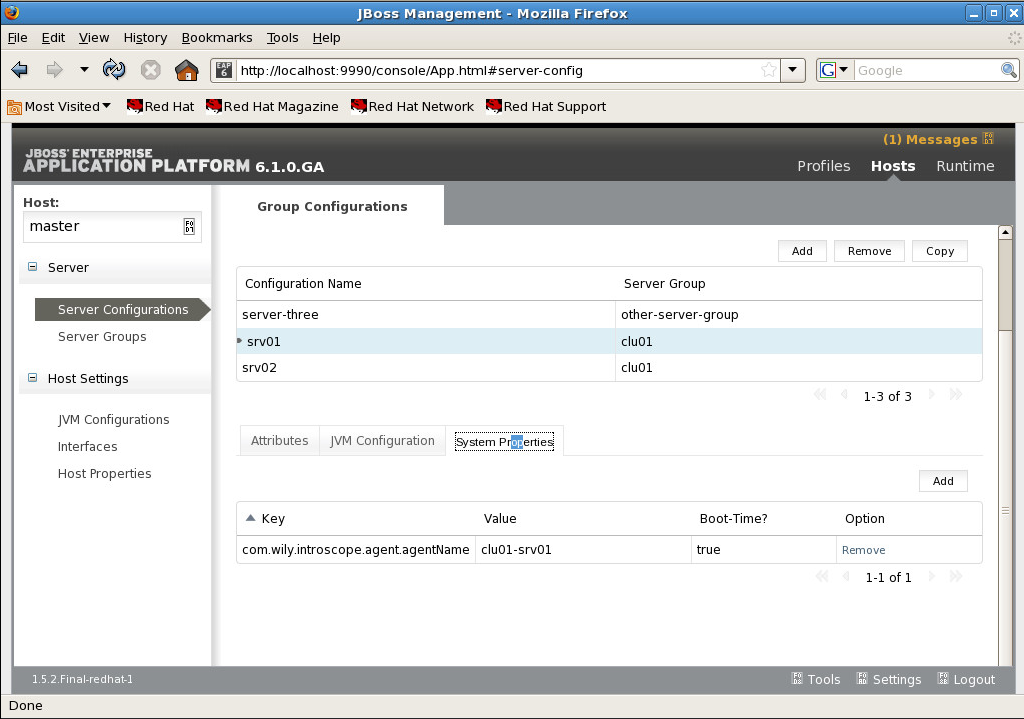
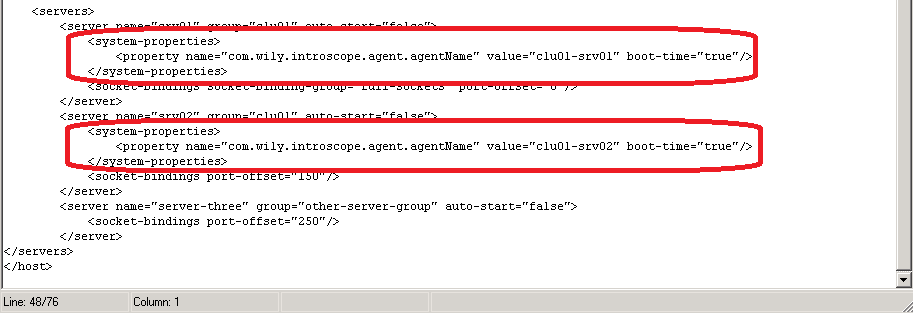
Step 7: Explicitly assign an agent name to each of the servers:
Click Server Configurations
Select srv01
Click System Properties
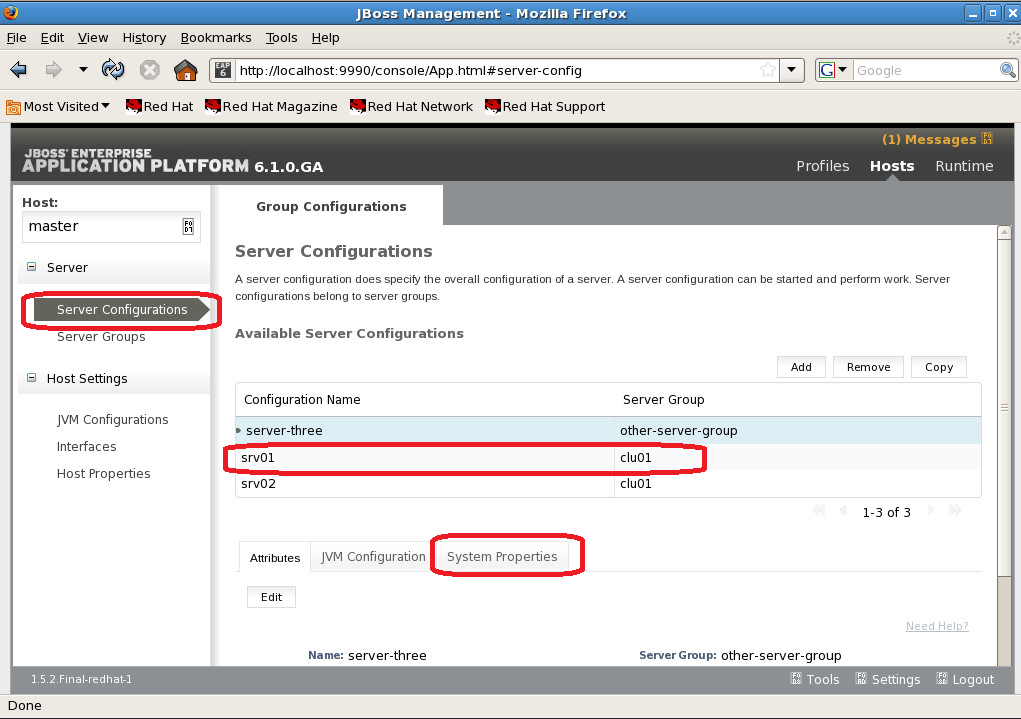
Click Add button
Create new property com.wily.introscope.agent.agentName=clu01-srv01
Select srv02
Click System Properties
Click Add button
Create new property com.wily.introscope.agent.agentName=clu01-srv02

Step 8: In case you need to enable autonaming, you need to register the WebAppSupport.jar
Click Runtime > Manage Deployments > Content Repository
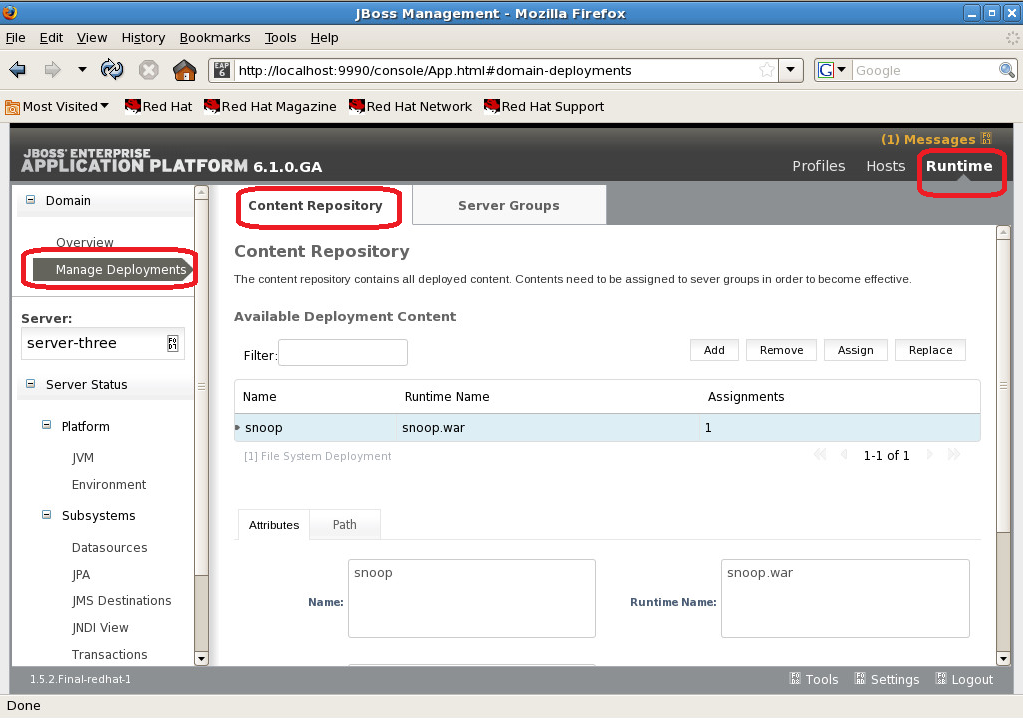
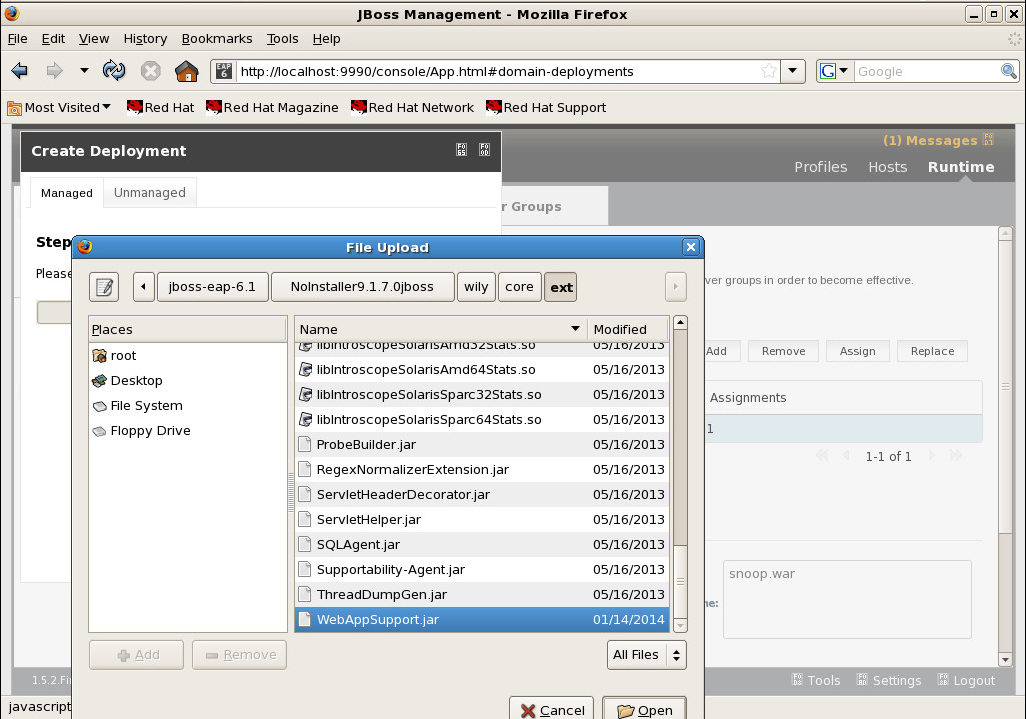
Click “Add” > Browse > select “WebApSupport.jar”
Click “Open”, then “Next” button
Click “Save”
i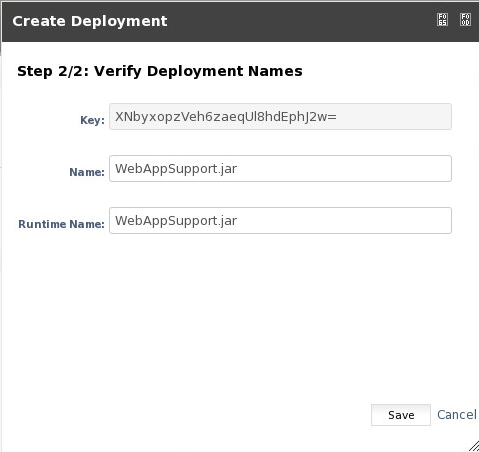
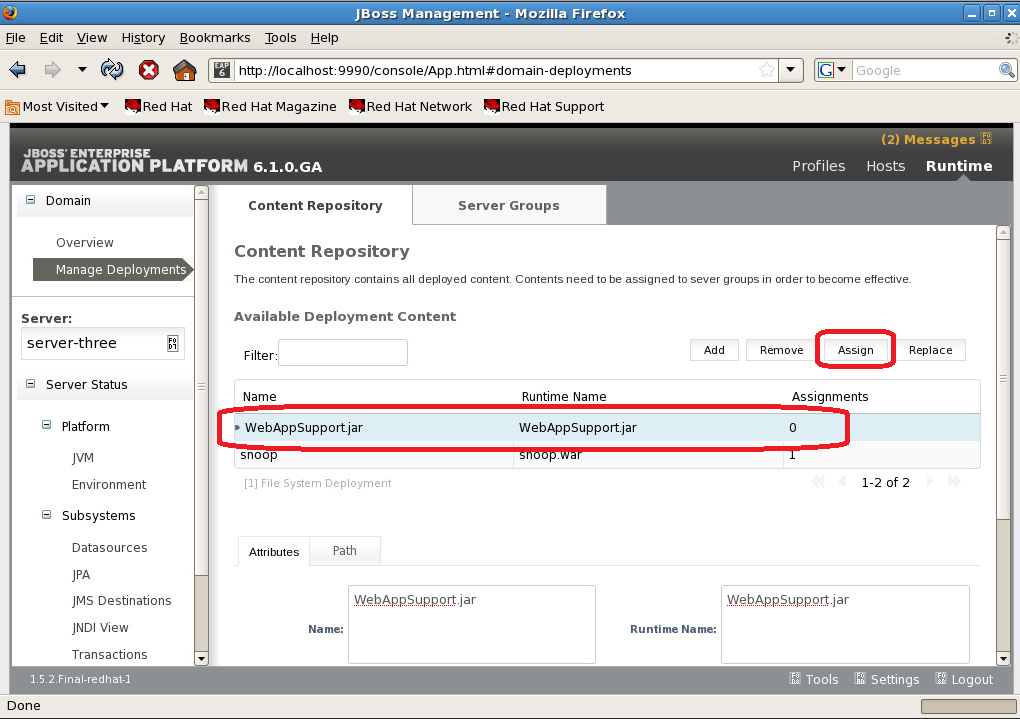
Select the WebAppSupport.jar
Click “Assign” button
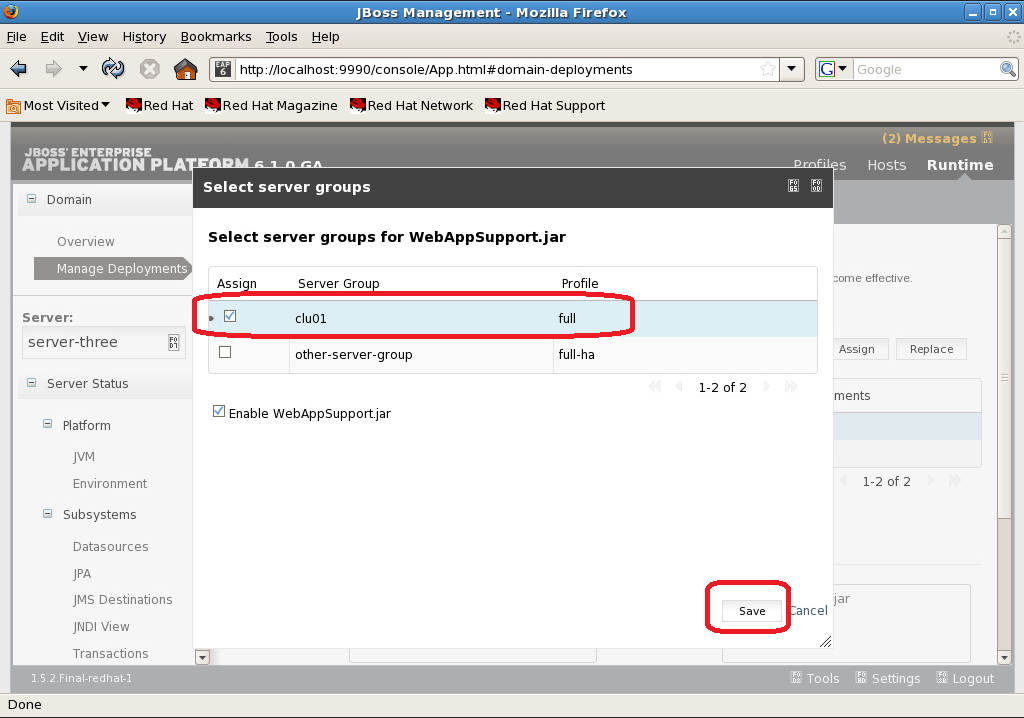
Select the Server Group, click “Save”
Step 9: Restart the appserver – the output will be the same as the initial without the agent.
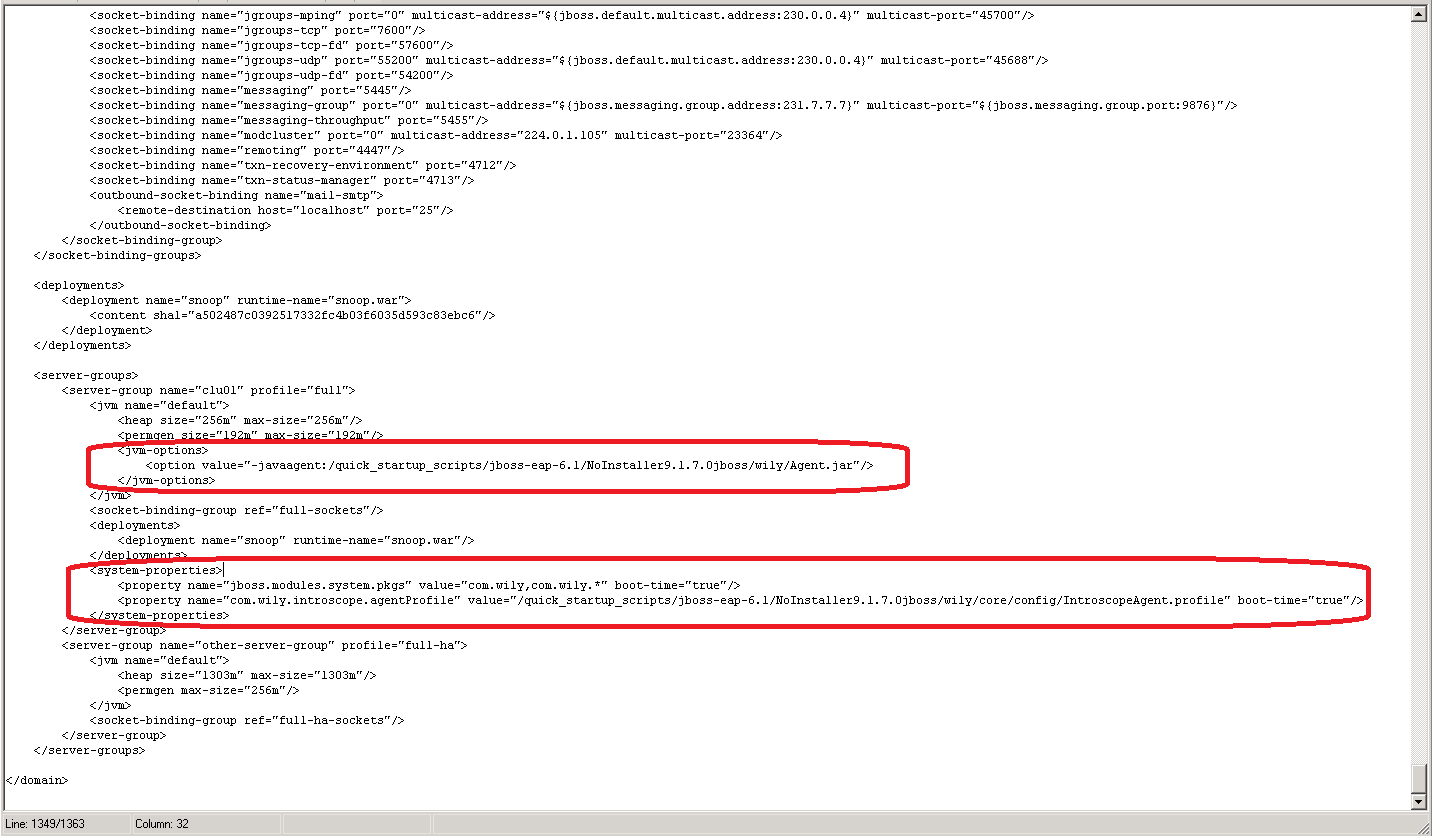
Step 10: Verify the Agent configuration in Jboss config files:
Go to JBOSS_HOME/domain/configuration
Open domain.xml
 …
…
<option value="-javaagent:/quick_startup_scripts/jboss-eap-6.1/NoInstaller9.1.7.0jboss/wily/Agent.jar"/>
..
<system-properties>
<property name="jboss.modules.system.pkgs" value="com.wily,com.wily.*" boot-time="true"/>
<property name="com.wily.introscope.agentProfile" value="/quick_startup_scripts/jboss-eap-6.1/NoInstaller9.1.7.0jboss/wily/core/config/IntroscopeAgent.profile" boot-time="true"/>
</system-properties>
Open Host.xml
Step 11: Go to the admin console to start the srv01 and srv02 instances.
By default, Overview > Topology should be the first page.
Move your mouse over srv01, a “Start Server” link will show up. Click the link to start the server instance.
Do the same for server instance#2.

As soon as you start the server instances, you should now be able to confirm that the agent is instrumenting the application by looking at the console:
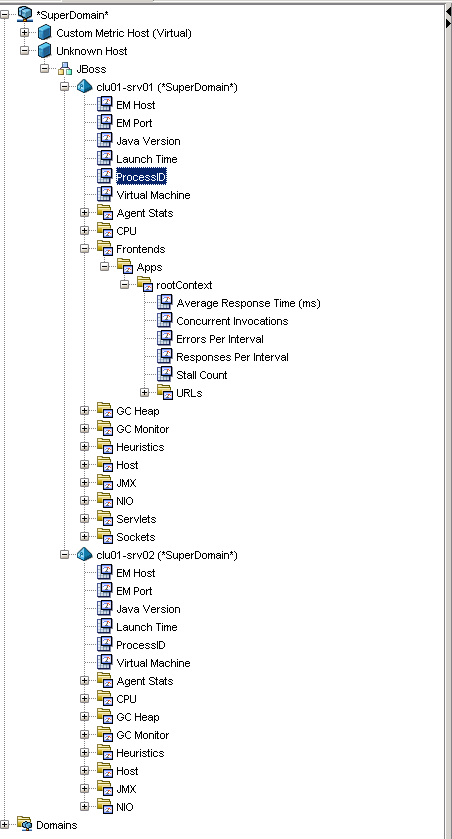
Step 12: Verify Instrumentation
Search the Entire CA APM Knowledge Base
