Hello CA API family!
I'm going to share how to register a new OAuth client and its key using the available OAuth Toolkit Clientstore REST API. For further details about this, and other available REST endpoints, please check this link out: APIs - CA API Management OAuth Toolkit - 3.5 - CA Technologies Documentation
Mutual SSL (2 way authentication):
In order to use the Clientstore REST interface, you have to do your homework and enable your SoapUI for mutual SSL. If you open up the Clientstore OTK endpoint, using the Policy Manager, you will find that it requires mutual SSL. When you use this kind of assertion, you need to define where you're going to authenticate those clients. In this case, the clientstore endpoint will use the "Gateway as a client FIP" identity provider, to authenticate itself. If you don't know what I'm talking about, check this out: Create FIP Authentication for Dual Gateways - CA API Management OAuth Toolkit - 3.5 - CA Technologies Documentation..

You can either use the issued gateway's certificate to authenticate your SoapUI, or create a new client. In this tutorial, to be more fun, I'm going to create a new client to be used from SoapUI.
Creating a new user for the SoapUI client authentication:
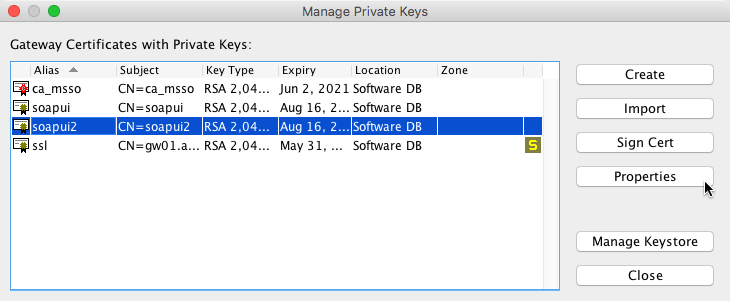
1. Within your Policy Manager, go to the top menu Tasks > Certificates, Keys and Secrets > Manage Private Keys
2. Click on Create and fill up the form with your new user's information, such as:

Notice that the Alias above will be your user name. Keep it in mind for the coming steps.
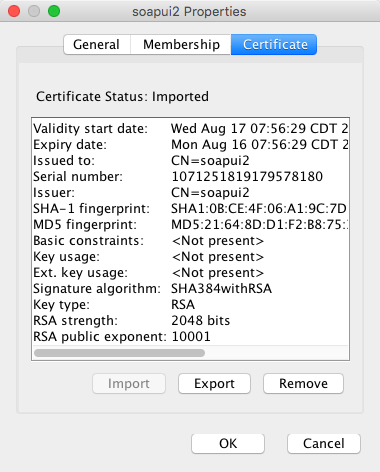
3. After creating the new user, pick it from the list and click on Properties:
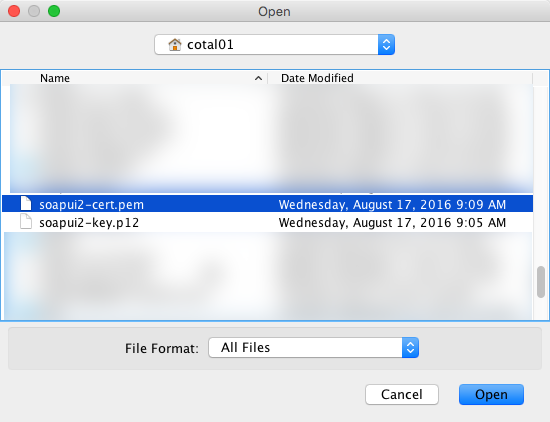
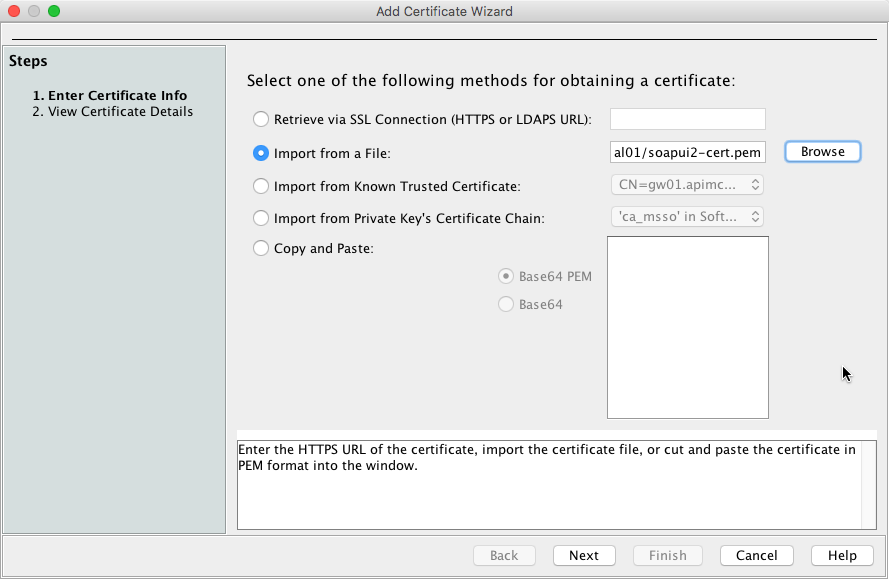
4. Now you will export both the key and the certificate. The key will be used, inside the SoapUI (P12) and the certificate (PEM) will be used during the user creation process. Make sure you use a password that you will remember when export the key. You will need it later, when select this exported P12 file into SoapUI.
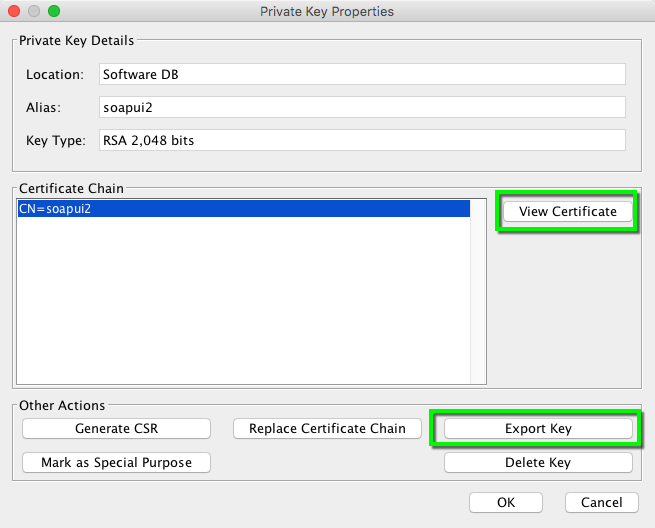
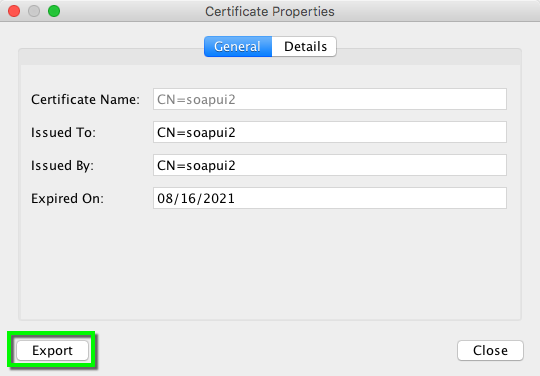
Make sure you pick the right file format as follows:

5. Go to the identity provider being used to authenticate the gateway, right click and select Create user. In the username field, use the same Alias you used to create your certificate, in this case, soapui2. Make sure you select "Define Additional Properties":

6. Inside the Certificate, import the PEM file exported previously:

Using the SoapUI to create a new OAuth client and key:
1. With your SoapUI opened, go to top menu File > Preferences, then SSL Settings. On the KeyStore, click on the Browse button and pick the exported P12 file. Make sure you enter the same password you chose when exported the key:

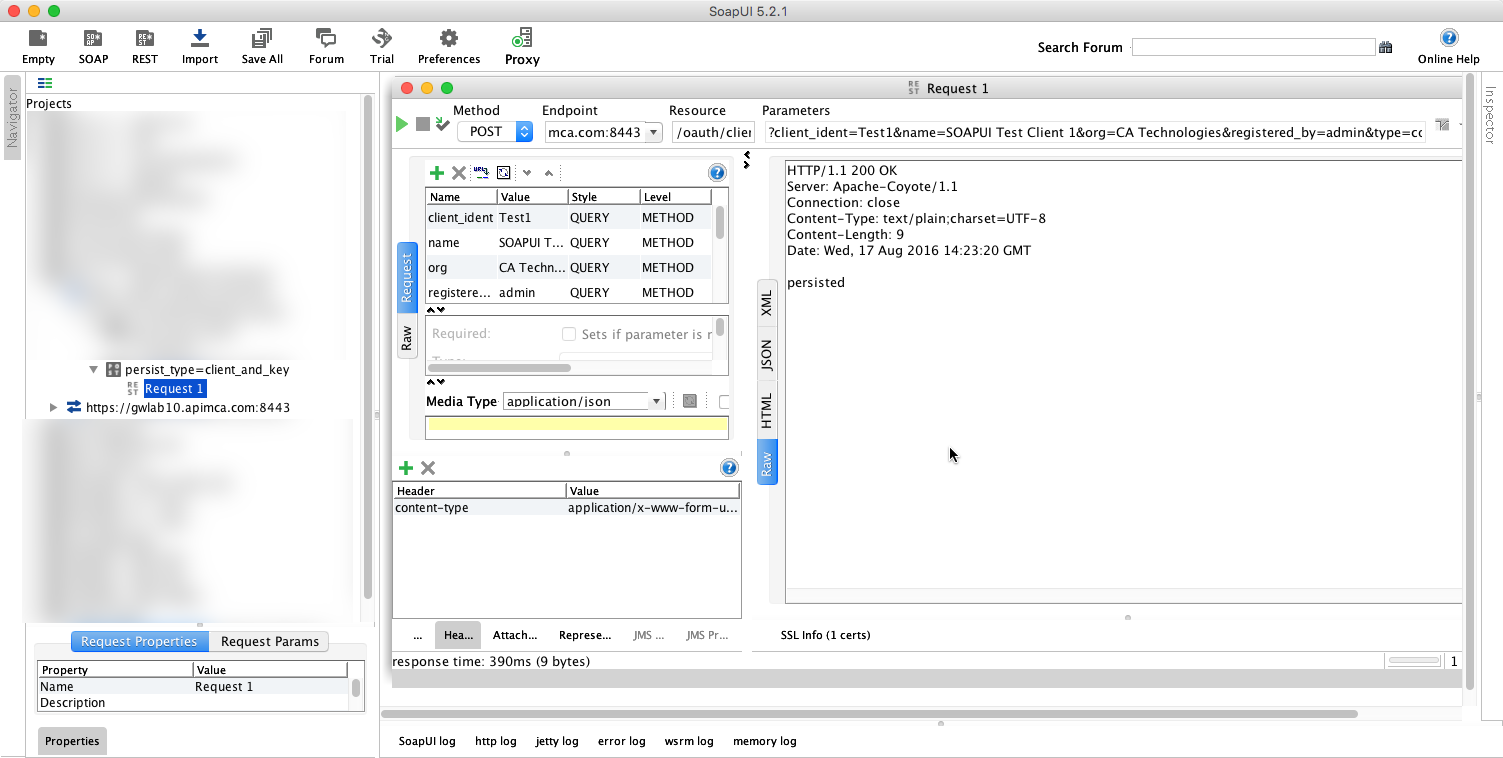
2. Create a new REST project and use the following URL, making sure you use YOUR APIM Gateway hostname/port:
https://<YOUR-GATEWAY-HOSTNAME>:8443/oauth/clientstore/store?client_ident=Test1&name=SOAPUI Test Client 1&org=CA Technologies®istered_by=admin&type=confidential&description=Created through SOAPUI REST Call&persist_type=client_and_key&client_key=e41104db-9d88-46d7-9cd7-7fa4f40d4ea7&status=ENABLED&secret=7f0e2904-48a4-454a-8263-6aa415eb4ab1&expiration=0
3. You can change both the client_key and secret to whatever you want, as long as they are unique in your system. I recommend you to use the external website Online UUID Generator Tool to generate both values.
4. Make sure you add the header content-type as application/x-www-form-urlencoded or it will not work. Also make sure you/re using the POST method. Hit the run button and you should see a RAW result like this:
5. Go to your OAuth Manager and check if both client and key have been created:


I hope this helps!