If your PAM is installed in a Virtual Machine:
Before upgrading an CA PAM VMware VM, take a snapshot of the VM so that you have a backup in case it is later needed. CA PAM normally creates a backup automatically as a first step when upgrading a hardware appliance. However, this step is not performed during a CA PAM VM upgrade because a VM does not have a secondary drive.
If your PAM is a physical appliance:
Before applying the update, CA PAM copies its primary drive (SSD) data (including database and configuration files) onto its backup drive. If there is any issue following upgrade, your CA PAM can be restored from that backup drive to its pre-upgrade state. Except if you upgrade from 2.8.x to 3.x.
Important:
- The upgrades requires a reboot. Ensure no user is working on the appliance.
- Go to Global Settings and set the Login Timeout to 0.
Patches: All patches- except for 2.8, 3.0.0, 3.1.1 - are available in https://support.ca.com/us/product-content/recommended-reading/technical-document-index/ca-privileged-access-manager-solutions-patches.html

Install the patches in the following order:
From Release 2.5 to 2.8.3:
- Upgrade to Release 2.6:
- XS_2.6
Go to Config > Upgrade.
Select the path XS_2.6 and click on Upload and Apply.
This will take some minutes. Don't move to another page.
Once the upgrade is completed, you will be asked to reboot. Click on OK.
- CAPAM_2.6_HF2_UpSize
Go to Config > Upgrade.
Select the path CAPAM_2.6_HF2_UpSize and click on Upload and Apply.
- Upgrade to Release 2.7:
- CAPAM_2.7.0
Go to Config > Upgrade.
Select the path CAPAM_2.7.0 and click on Upload and Apply.
This will take some minutes. Don't move to another page.
Once the upgrade is completed, you will be asked to reboot. Click on OK.
- Upgrade to Release 2.8.0:
- CAPAM_2.8.0
Go to Config > Upgrade.
Select the path CAPAM_2.8.0 and click on Upload and Apply.
This will take some minutes. Don't move to another page.
Once the upgrade is completed, you will be asked to reboot. Click on OK.
- Upgrade to Release 2.8.3:
- CAPAM_2.8.3
Select the path CAPAM_2.8.3 and click on Upload and Apply.
This will take some minutes. Don't move to another page.
Once the upgrade is completed, you will be asked to reboot. Click on OK.
Release 3.0.2:
To upgrade to release 3.0.2, you need to upgrade first to Release 3.0.0. This is a base version to move to the new release.
You can find the release 3.0.0 in our Download Manager in support.ca.com:
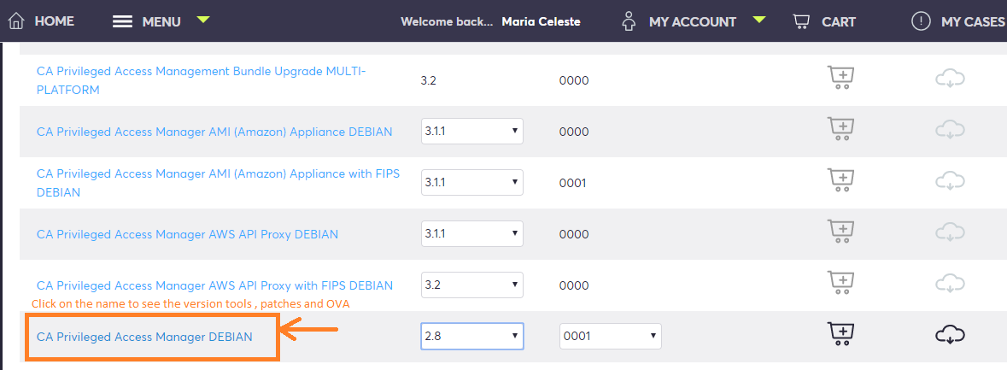
Search for CA PRIVILEGED ACCESS MANAGER Debian. Select Release version 3.0.1. Here you will find the release 3.0.0.
Don't donwload the release 3.0.1. We will move forward to release 3.0.2 which includes more hotfixes.
- You will need the following files:
- PRIVILEGED ACCESS MANAGER MIGRATION PATCH R3.0E
- CA PRIVILEGED ACCESS MANAGER MIGRATION PATCH PAYLOAD R3.0 - ESD ONLY : This file has to be copied in the directory where the session recording are stored.
For more information: https://docops.ca.com/ca-privileged-access-manager/3-0/EN/upgrading/upgrade-the-software-on-a-single-appliance#UpgradetheSoftwareonaSingleAppliance-PostUpgradeProcedures
Release 3.0.2:
Once you are in release 3.0.0, you can install CAPAM_3.0.2:
Go to Configuration > Upgrade.
Select the path CAPAM_3.0.2 and click on Upload and Apply.
This will take some minutes. Don't move to another page.
Once the upgrade is completed, you will be asked to reboot. Click on OK
NOTE for releases 3.0.X:
If you work with LDAP+RSA Authentication, then you need to follow the below steps once you upgrade to release 3.0.2:
1. Verify that the CA PAM hostname that is registered in the RSA ACE server matches the Hostname in the CA Privileged Access ManagerConfiguration, Network, Network Settings.
2. Go to CA Privileged Access ManagerConfiguration, 3rd Party, RSA.
3. Select Current mandatory RSA configuration file and select Delete to delete the sdconf.rec file.
4. On the Upload File tab, select Choose File and Upload to upload the sdconf.rec file again.
5. On the RSA Files tab, select Current optional RSA configuration file and select Delete to delete the sdopts.rec file.
6. On the Upload File tab, select Choose File and Upload to upload the sdopts.rec file again.
If you do not have a sdopts.rec file, create an empty sdopts.rec file and upload it.
Note: If you are using an RSA cluster, edit the sdopts.rec file. Give the highest priority (10) to the RSA nodes that are closest to the CA PAM appliance. Upload this file on the Upload File tab.
7. Select Node Secret and select Delete to delete it. The RSA Administrator should delete the Node Secret on the RSA server.
8. Reboot the CA Privileged Access Manager server.
9. Confirm that RSA login is successful