Team,
I have been using these scripts for a while, and thought I would share.
- Scripts enclosed (attachments and within this post)
I have five (5) steps I use to create a AD lab, that will support MS Exchange lab as well.
- These can be on the same server, but if you wish to replicate a client's environment, use a second server to document the external network traffic between the two (2) servers.
I have eleven (11) steps I use to create a remote MS Exchange lab, using the prior AD domain as the supporting component.
- This MS Exchange lab will be able to support OWA via MS-IIS for webmail testing scenarios.
If you find these useful, or would like to enhance them, please do.
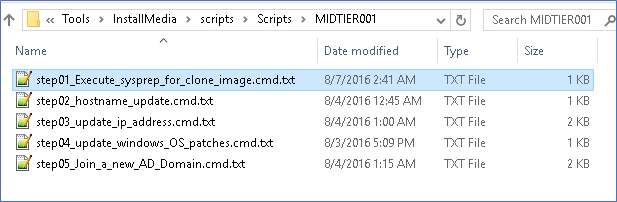
### AD Lab Five (5) Steps - Details below ###
step01_hostname_update.cmd.txt
::Rename Hostname Options
set NEWHOSTNAME=dc001
::wmic method
wmic computersystem where name="%COMPUTERNAME%" call rename name="%NEWHOSTNAME%"
::Requires a reboot action
shutdown /r /t 30
step02_update_ip_address.cmd.txt
::Update from DHCP IP to Static IP Address Options
set NIC_ADP_NAME=Ethernet1
:: set NIC_ADP_NAME=Local Area Connection
set IP_ADDR=10.10.10.3
set IP_MASK=255.255.255.0
set IP_GW=10.10.10.2
::netsh method #1
:: Display Config
netsh interface ip show config
:: Save Before State
netsh -c interface dump > c:\%COMPUTERNAME%_NIC_before_state.txt
::netsh -f c:\%COMPUTERNAME%_location_before_state.txt
:: Update IP Address
netsh interface ip set address name=%NIC_ADP_NAME% static %IP_ADDR% %IP_MASK% %IP_GW% 1
:: Save After State/Update
netsh -c interface dump > c:\%COMPUERNAME%_NIC_after_state.txt
step03_update_windows_OS_patches.cmd.txt
:: https://technet.microsoft.com/en-us/windows-server-docs/get-started/release-notes--important-issues-in-windows-server-2016-technical-preview
:: https://support.microsoft.com/en-us/kb/3157663
::Scan & find latest patches
wuauclt.exe /DectectNow /ReportNow
::Force update after scan
Wuauclt.exe /UpdateNow
::Show Update GUI
Wuauclt.exe /ShowWU
step04_Create_a_new_AD_Domain.cmd.txt
@echo on
::https://technet.microsoft.com/en-us/windows-server-docs/identity/ad-ds/deploy/install-active-directory-domain-services--level-100-
::Installing AD DS by Using Windows PowerShell
::Beginning with Windows Server 2012 , you can install AD DS using Windows PowerShell.
Install-WindowsFeature -Name AD-Domain-Services -IncludeManagementTools
Install-ADDSForest `-CreateDnsDelegation:$false ` -DatabasePath "C:\Windows\NTDS" ` -DomainMode "Win2012" ` -DomainName "exchange.lab" ` -DomainNetbiosName "EXCHANGE" ` -ForestMode "Win2012" ` -InstallDns:$true ` -LogPath "C:\Windows\NTDS" ` -NoRebootOnCompletion:$false ` -SysvolPath "C:\Windows\SYSVOL" ` -Force:$true
step05_Create_CA_public_Cert.cmd.txt
@echo on
:: Create a CA root Certificate
:: Set an initial openssl configuration file
set OPENSSL_CONF=C:\OpenSSL-Win64\bin\openssl.cfg
set FQDN=dc001.exchange.lab
set PASSWORD=P$ssword01
:: Make a output folder
mkdir c:\temp\openssl
:: Clean up Certs from prior executions / stores
certutil -delstore "Root" ###_LAB_ROOT_CA_Cert_Auth_For_Active_Directory_###
certutil -delstore "My" %FQDN%
:: Update inf file with the latest FQDN name
copy ADS_server_cert_request.inf c:\temp\openssl\ADS_server_cert_request.inf
:: Generate a private CA key
cd /d C:\OpenSSL-Win64\bin
openssl genrsa -des3 -passout pass:%PASSWORD% -out c:\temp\openssl\01.rootCA.key 1024
openssl rsa -in c:\temp\openssl\01.rootCA.key -passin pass:%PASSWORD% -out c:\temp\openssl\02.rootCA_nopassword.key
:: Create a self-signed x509 cert
openssl req -out c:\temp\openssl\03.rootCA.crt -key c:\temp\openssl\02.rootCA_nopassword.key -new -x509 -days 7300 -subj "/CN=###_LAB_ROOT_CA_Cert_Auth_For_Active_Directory_###"
:: Execute on the Active Directory Server (DC) only
certreq -f -new c:\temp\openssl\ADS_server_cert_request.inf c:\temp\openssl\%FQDN%.csr
:: Sign the CSR with the private CA key
openssl x509 -req -days 3650 -in c:\temp\openssl\%FQDN%.csr -CA c:\temp\openssl\03.rootCA.crt -CAkey c:\temp\openssl\02.rootCA_nopassword.key -set_serial 01 -out c:\temp\openssl\%FQDN%.crt
:: On both the AD & IMPS Servers, import the CA root file into (Local Computer \ Trusted Root Cert Auth \ Certificates)
::certlm.msc
certutil -addstore "Root" c:\temp\openssl\03.rootCA.crt
:: Only on the AD server, accept the signed cert. This MUST PASS to SUCCEED
:: Cert will then be auto-copied to (Local Computer \ Personal \ Certificates )
certreq -accept c:\temp\openssl\%FQDN%.crt
pause
:: Validate TCP 636 is available with a SSL Cert; may use MS LDP. Note: DC may not need to be rebooted/bounced.
ldp.exe
ADS_server_cert_request.inf.txt
;----------------- request.inf -----------------
[Version]
Signature="$Windows NT$"
[NewRequest]
Subject = "CN=dc001.exchange.lab"
;
KeySpec = 1
KeyLength = 1024
Exportable = TRUE
MachineKeySet = TRUE
SMIME = False
PrivateKeyArchive = FALSE
UserProtected = FALSE
UseExistingKeySet = FALSE
ProviderName = "Microsoft RSA SChannel Cryptographic Provider"
ProviderType = 12
RequestType = PKCS10
KeyUsage = 0xa0
[EnhancedKeyUsageExtension]
OID=1.3.6.1.5.5.7.3.1 ; this is for Server Authentication
### AD Lab Five (5) Steps - Details above ###
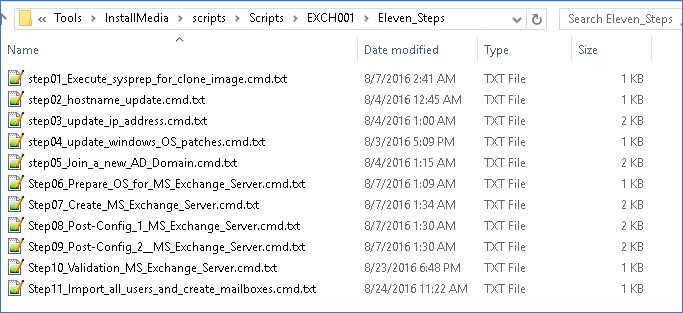
### MS Exchange Lab Eleven (11) Steps - Details below ###
step01_Execute_sysprep_for_clone_image.cmd.txt
:: Run MS Sysprep to generate new SID if image was cloned.
:: Will need to re-activate with MS Windows
C:\Windows\System32\Sysprep\Sysprep.exe /generalize /reboot
step02_hostname_update.cmd.txt
::Rename Hostname Options
set NEWHOSTNAME=exch001
::wmic method
wmic computersystem where name="%COMPUTERNAME%" call rename name="%NEWHOSTNAME%"
::Requires a reboot action
shutdown /r /t 30
step03_update_ip_address.cmd.txt
::Update from DHCP IP to Static IP Address Options
set NIC_ADP_NAME=Ethernet1
:: set NIC_ADP_NAME=Local Area Connection
set IP_ADDR=10.10.10.4
set IP_MASK=255.255.255.0
set IP_GW=10.10.10.2
set DNS=10.10.10.3
::netsh method #1
:: Display Config
netsh interface ip show config
:: Save Before State
netsh -c interface dump > c:\%COMPUTERNAME%_NIC_before_state.txt
::netsh -f c:\%COMPUTERNAME%_location_before_state.txt
:: Update IP Address
netsh interface ip set address name=%NIC_ADP_NAME% static %IP_ADDR% %IP_MASK% %IP_GW% 1
:: Save After State/Update
netsh -c interface dump > c:\%COMPUERNAME%_NIC_after_state.txt
::netsh -f c:\%COMPUTERNAME%_location_after_state.txt
::Does NOT requires a reboot action
::Netsh method to update DNS to static addresses
netsh interface ip set dns %NIC_ADP_NAME% static %DNS%
netsh interface ip set wins %NIC_ADP_NAME% static %DNS%
step04_update_windows_OS_patches.cmd.txt
:: https://technet.microsoft.com/en-us/windows-server-docs/get-started/release-notes--important-issues-in-windows-server-2016-technical-preview
:: https://support.microsoft.com/en-us/kb/3157663
::Scan & find latest patches
wuauclt.exe /DectectNow /ReportNow
::Force update after scan
Wuauclt.exe /UpdateNow
::Show Update GUI
Wuauclt.exe /ShowWU
step05_Join_a_new_AD_Domain.cmd.txt
set DOMAIN=EXCHANGELAB
set PASSWORD=P$ssword01
:: Join the AD Domain "exchange.lab"
:: netdom join <Computer> {/d: | /domain:}<Domain> [/ou:<OUPath>] [{/ud: | /userd:}[<Domain>\]<User> [{/pd: | /passwordd:}{<Password>|*}]] [{/uo: | /usero}<User> [{/po: | /passwordo}{<Password>|*}] [/reboot[:,Delay>]] [/help | /?]
netdom join "%COMPUTERNAME%" /d:%DOMAIN% /ud:%DOMAIN%\Administrator /pd:%PASSWORD% /Reboot
pause
Step06_Prepare_OS_for_MS_Exchange_Server.cmd.txt
::Within Powershell, add in the RSAT Tools (ADUC/ADSC) used for testing and view the AD domain; via powershell window.
powershell Install-WindowsFeature RSAT-ADDS
powershell.exe Install-WindowsFeature AS-HTTP-Activation, Desktop-Experience, NET-Framework-45-Features, RPC-over-HTTP-proxy, RSAT-Clustering, RSAT-Clustering-CmdInterface, RSAT-Clustering-Mgmt, RSAT-Clustering-PowerShell, Web-Mgmt-Console, WAS-Process-Model, Web-Asp-Net45, Web-Basic-Auth, Web-Client-Auth, Web-Digest-Auth, Web-Dir-Browsing, Web-Dyn-Compression, Web-Http-Errors, Web-Http-Logging, Web-Http-Redirect, Web-Http-Tracing, Web-ISAPI-Ext, Web-ISAPI-Filter, Web-Lgcy-Mgmt-Console, Web-Metabase, Web-Mgmt-Console, Web-Mgmt-Service, Web-Net-Ext45, Web-Request-Monitor, Web-Server, Web-Stat-Compression, Web-Static-Content, Web-Windows-Auth, Web-WMI, Windows-Identity-Foundation
pause
shutdown /r /t 30
Step07_Create_MS_Exchange_Server.cmd.txt
::Unified Communications Managed API 4.0 Runtime
::https://www.microsoft.com/en-us/download/details.aspx?id=34992&tduid=(f17d31c2cd88ad69241ab36d6f81d168)(256380)(2459594)(TnL5HPStwNw-N_lj9GjeaAyG9HiDoclEEg)()
cd /d "C:\InstallMedia\Unified Communications Managed API 4.0 Runtime"
UcmaRuntimeSetup.exe /passive /norestart
::Within Powershell, execute the following:
::powershell.exe "Exchange Schema Version = " + ([ADSI]("LDAP://CN=ms-Exch-Schema-Version-Pt," + ([ADSI]"LDAP://RootDSE").schemaNamingContext)).rangeUpper
::pause
::Execute the MS Exchange 2016 Server setup.exe
cd /d C:\InstallMedia\Exch2016
setup /PrepareSchema /IAcceptExchangeServerLicenseTerms
pause
Step08_Post-Config_1_MS_Exchange_Server.cmd.txt
::Execute the MS Exchange 2016 Server
cd /d C:\InstallMedia\Exch2016
setup /PrepareAD /OrganizationName:"ExchangeLab" /IAcceptExchangeServerLicenseTerms
pause
Step09_Post-Config_2__MS_Exchange_Server.cmd.txt
::Execute the MS Exchange 2016 Server setup.exe
cd /d C:\InstallMedia\Exch2016
setup /Mode:Install /Role:Mailbox /IAcceptExchangeServerLicenseTerms
pause
Step10_Validation_MS_Exchange_Server.cmd.txt
::Within Exchange Management Shell
test-servicehealth
get-exchangeserver | format-list
:: Within IE or any Browser
:: Exchange Admin UI
https://exch001.exchange.lab/ecp/?ExchClientVer=15
:: Exchange OWA (WebMail)
https://exch001/owa/#path=/mail
:: Bad DNS will slow down Exchange UI / OWA and impact email delivery.
:: Ensure DNS is correct and resolvable.
Step11_Import_all_users_and_create_mailboxes.cmd.txt
::Search Active Directory and grant mailbox to all users within an base OU
:: Use MS Exchange Management Shell
Import-module activedirectory
$users = Get-ADUser -LDAPfilter '(name=*)' -searchBase {OU=CompanyABC_Users_OU,DC=exchange,DC=lab}
foreach($user in $users)
{
Enable-Mailbox -Identity $user.SamAccountName
}
:: Limited to first 1000
Get-User -OrganizationalUnit "OU=CompanyABC_Users_OU,DC=exchange,DC=lab" | Enable-Mailbox
:: Open to all
Get-User -OrganizationalUnit "OU=CompanyABC_Users_OU,DC=exchange,DC=lab" -ResultSize "Unlimited" | Enable-Mailbox
Get-User -OrganizationalUnit "OU=Office_001,OU=CompanyABC_Users_OU,DC=exchange,DC=lab" -ResultSize "Unlimited" | Enable-Mailbox
Get-User -OrganizationalUnit "OU=Office_002,OU=CompanyABC_Users_OU,DC=exchange,DC=lab" -ResultSize "Unlimited" | Enable-Mailbox
Get-User -OrganizationalUnit "OU=Office_003,OU=CompanyABC_Users_OU,DC=exchange,DC=lab" -ResultSize "Unlimited" | Enable-Mailbox
### MS Exchange Lab Eleven (11) Steps - Details above ###
### EXTRA - 2nd MS Windows Server to join the AD lab Five (5) Steps - Details below ###
- Example: May wish a server or workstation (MS Win 7/8/10) to support the domain for solution tools, e.g. IM Provisioning Server or IM Connector Server or IG Workpoint/Governance Tool Server.
step01_Execute_sysprep_for_clone_image.cmd.txt
:: Run MS Sysprep to generate new SID if image was cloned.
:: Will need to re-activate with MS Windows
C:\Windows\System32\Sysprep\Sysprep.exe /generalize /reboot
step02_hostname_update.cmd.txt
::Rename Hostname Options
set NEWHOSTNAME=exch001
::wmic method
wmic computersystem where name="%COMPUTERNAME%" call rename name="%NEWHOSTNAME%"
::Requires a reboot action
shutdown /r /t 30
step03_update_ip_address.cmd.txt
::Update from DHCP IP to Static IP Address Options
set NIC_ADP_NAME=Ethernet1
:: set NIC_ADP_NAME=Local Area Connection
set IP_ADDR=10.10.10.4
set IP_MASK=255.255.255.0
set IP_GW=10.10.10.2
set DNS=10.10.10.3
::netsh method #1
:: Display Config
netsh interface ip show config
:: Save Before State
netsh -c interface dump > c:\%COMPUTERNAME%_NIC_before_state.txt
::netsh -f c:\%COMPUTERNAME%_location_before_state.txt
:: Update IP Address
netsh interface ip set address name=%NIC_ADP_NAME% static %IP_ADDR% %IP_MASK% %IP_GW% 1
:: Save After State/Update
netsh -c interface dump > c:\%COMPUERNAME%_NIC_after_state.txt
::netsh -f c:\%COMPUTERNAME%_location_after_state.txt
::Does NOT requires a reboot action
::Netsh method to update DNS to static addresses
netsh interface ip set dns %NIC_ADP_NAME% static %DNS%
netsh interface ip set wins %NIC_ADP_NAME% static %DNS%
::Netsh method to reset back to DHCP
::netsh interface ip set address %NIC_ADP_NAME% dhcp
::netsh interface ip set dns %NIC_ADP_NAME% dhcp
:: Disable IPv6 for DNS performance, if desired for small network
::netsh interface ipv6 6to4 set state state=disabled
::netsh interface ipv6 isatap set state state=disabled
::netsh interface ipv6 set teredo disable
:: Display Config After Update
netsh interface ip show config
step04_update_windows_OS_patches.cmd.txt
::Scan & find latest patches
wuauclt.exe /DectectNow /ReportNow
::Force update after scan
Wuauclt.exe /UpdateNow
::Show Update GUI
Wuauclt.exe /ShowWU
step05_Join_a_new_AD_Domain.cmd.txt
set DOMAIN=EXCHANGELAB
set PASSWORD=P$ssword01
:: Join the AD Domain "exchange.lab"
netdom join "%COMPUTERNAME%" /d:%DOMAIN% /ud:%DOMAIN%\Administrator /pd:%PASSWORD% /Reboot
### EXTRA - 2nd MS Windows Server to join the AD lab Five (5) Steps - Details above ###